
To get started with Archipack we first need to enable the add-on. Press F4 and open the file context menu and from here open preferences. On the left click and open the add-ons tab. (Start typing Archipack) I find typing up top can be the fastest way to find what your looking for.
Enabling the Add-on

The Archipack add-on appears and we can enable it with this check mark.
Expand it and here at you can see the location of the add-on. This can be found on the sidebar in the create tab. You will find further information by clicking the documentation button within the add-on. The add-on has two setup actions. The first is to add a material library. This is a blend file that can be downloaded from the Archipack website. The second action are to render the preset thumbnails. These thumbnails are previews of the objects available to create with the add-on. We first need the material library so these render with thumbnails render with materials So lets get that library by clicking documentation. This has opened a browser off screen and I can drag that in here and expand it. On the right side of the screen here I can click setup. This opens a page with a link to the material library below here.
Material Library

Click download default material library. I can save this and it will download to my downloads folder. Once downloaded I can move this to a permanent location. Anytime Blender adds an Archipack object it will reference this file for materials. You can by pass this step as the default materials are basic. Each object gets created with material slots that allow you quickly add your own custom material to each.
Let jump back into Blender and add the location of that material library. Back in the add-on we can click this folder icon here.
Linking Material Library

This opens a file explorer and you can navigate to where you saved the material library file. I have this saved in this folder. Now click accept and get back to preferences. More custom settings are available below here to adjust the properties listed. The final step is to render the preset thumbnails. This will take a few minutes and I can speed this section up. The system console opens and the add-on will begin rendering thumbnails for each of the objects. This is to help reduce the add-on size and keep the Blender application small. I find dragging the slider down one way to tell the rendering is complete. The thumbnails are saved in the add-on folder and you don’t need to do any more. It is recommended to restart Blender once complete.
Thumbnail Rendering

This hasn’t updated recently so must be complete. I can close preferences. Now come to file and new and reload start up. Now to view the add-on press N and open the sidebar and it will be here in the create tab. Expand it here to view the available parametric objects available.
Roof Thumbnails

If I click the roof for example the thumbnails have rendered with a material. If I click the door however they are still white but I can see the style clearly. Press the ESC key to exit. In the scene press A to select everything then X and delete these three objects.
Right now the cursor is at world zero. If not press Shift + S and put the cursor to world origin.
Adding a Wall Object

Lets start by clicking and adding a wall object. This gets added at the location of the 3D cursor with manipulator handles to adjust the size and number of walls. A second tab also gets created here called Archipack. Here you can increase the wall count to 2. These can be controlled below in the part section. Here I can input 10 into the length.
Straight or Curved

The default is straight and the second option is for a curved wall. Lets leave it set to straight. If we increase the number of parts to 2 we can then use the manipulator in the scene to adjust the length. Click and drag to modify this value.
Manipulate Button

This can cause the gizmo to disappear and we can switch this back on in the add-on. Now in part 2 increase the length to 10.
Wall Number Arrow
The arrow with 2 beside it is the number of walls. Clicking this will increase the number. Then either adjust the length using the manipulator or update it on the add-on in the wall part settings. I can increase this to 10 also.
Close Wall

To finish the wall click close up top here. This connects up the last wall with the first.
Lets come back to the create tab. Once you have a wall created the slab option becomes available and we can add one in. This takes up the width and depth of the wall and the thickness can be adjusted in the Archipack tab here. Auto sync keeps the slab locked to the dimensions of the walls. Adjusting the wall sizes will also adjust the slab. Expanding the part settings allow for more customisation on the slab. You can split each side of the slab down further. Add a balcony or remove that side.
Slab Settings
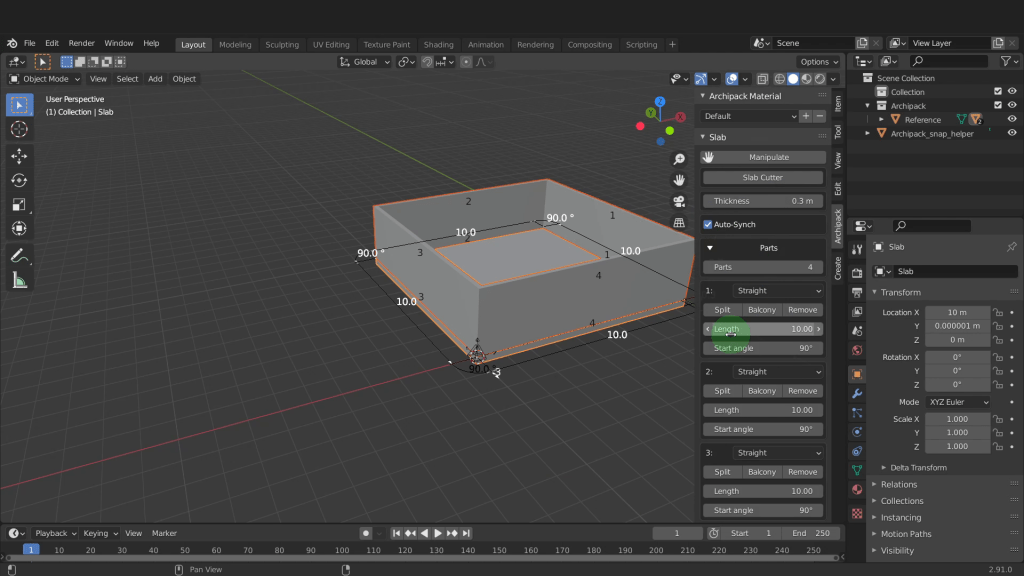
I find this to be a little buggy in this version of Blender.
Add a window

Lets come back to the create tab and add a window. Lets go with this 180 X 210 flat. This also gets added at the position of the 3D cursor. If we press Numpad and come into a front view we can press Z and switch to wireframe. In the item tab input -5000 and centre this up. Now lets open back up the Archipack tab. Increase the width to 9 and increase the panels to 4. Here you can adjust the column offset or add a light portal.
Light Portal
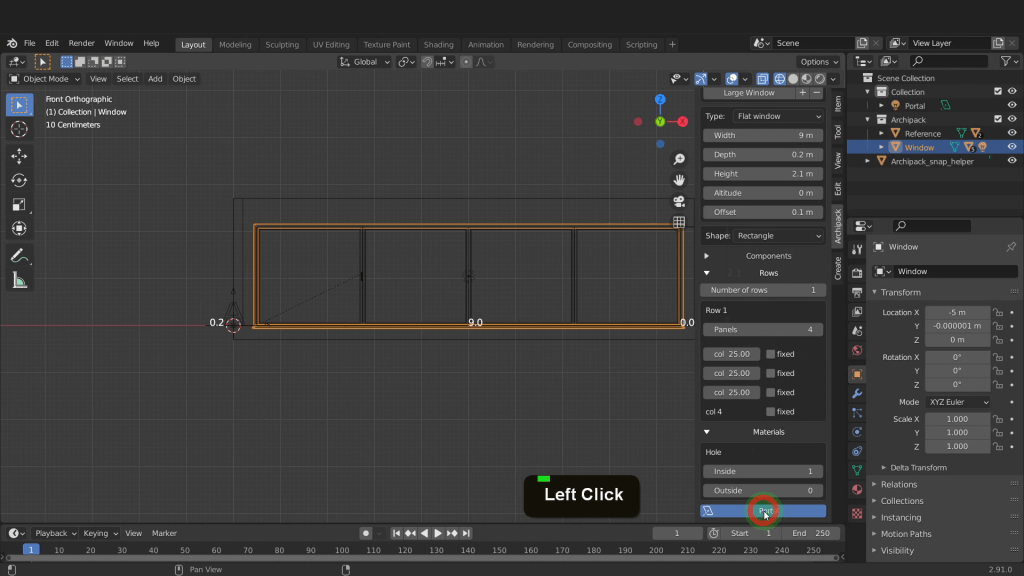
This portal directs light from light sources in through the window and will improve interior lighting.
Blind Option
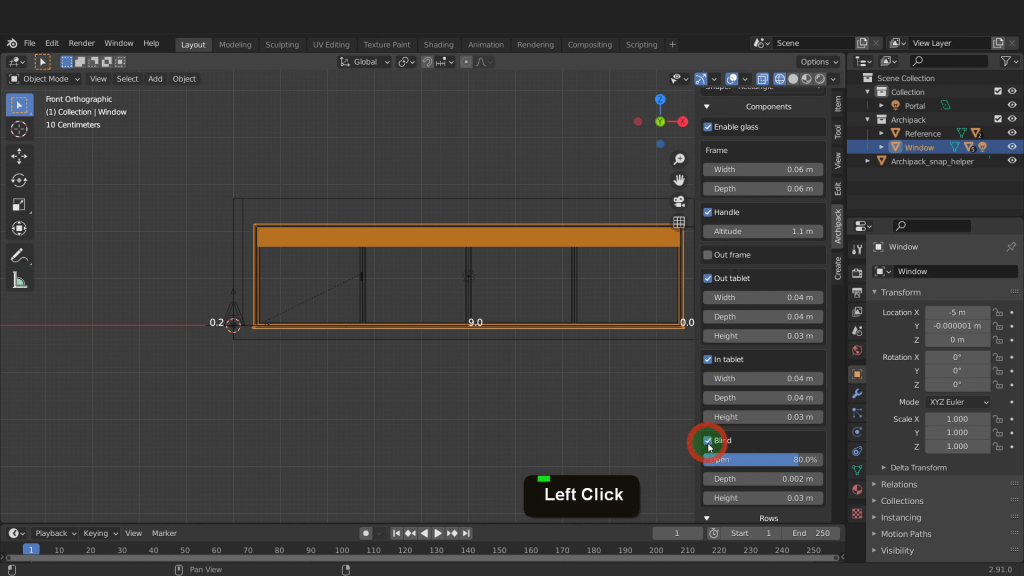
In the component drop down you can adjust the frame handle base tablet and add a blind. Press Z and switch to solid shading. Clearly the blind should be on the inside so I can press R Z input 180 and enter. We can also move this back inside the wall. Press Numpad 3 for a side view and switch back to wireframe shading. (Rotate around). Press G and drag this back along the Y axis and center up on the wall. (Rotate Around) The window comprises multiple objects such as the panels, blind and handle. All these are parented to the window as we can see in the object properties tab and in relations. Lets switch back to solid shading. The next thing will be to cut a hole in the wall so the window will be visible. Select the wall and open the create tab.
Boolean Operation

Here we can click boolean. This will subtract the difference between the window and wall. If we come to the modifiers tab here a boolean modifier has been added to the wall and this object here is used as a cutter. That is this wireframe object here. It forms part of the window unit and is un selectable.
Lets come to the create tab and add a door. Here I can choose 80 X 200. If we open the Archipack tab the properties for the door are available to edit. Here you can adjust the dimensions. Change the direction the door rotates open.
Door

Whether it has a handle and the door panel style and settings. Lets rotate this 90 in the Z axis. Now press G Shift Z to exclude the Z axis and move that over into this wall here. Position that centre here. Now select the wall and in the create tab click boolean to create an opening for the door.
Lets come back to the Archipack tab. Here we can increase the height to 6 metres and make room for a second storey. We can also adjust the walls and prepare for a roof. If we expand part 1 of the wall we can increase the number of splits to 3. This will allow us create an apex to fit a roof. I can zero out position 2. In the second altitude field I can input 2.46. tab into position 2 and input 0.5. Tab into position 3 and input 0.84. The split position and altitude can be positioned to form the slope you want for the roof. Lets minimise part 2 and expand part 3. Increase the splits to 3 first. Now we can input the same values here to match the opposite gable wall. Zero out position 2.
Gable Ends

In the second altitude field input 2.46. Tab into position 2 and input 0.5. Tab into position 3 and input 0.84. With that complete lets add a roof. On the create tab click roof. Now chose one from here. Lets add this one in here. That gets added and will need to be resized so switch to this tab. I know the dimensions for this roof so I can click into the altitude and input 8.63. The left and right slope will will be 0.5. Tab into the left width and input 5.3 and match that in the right width.
Roof
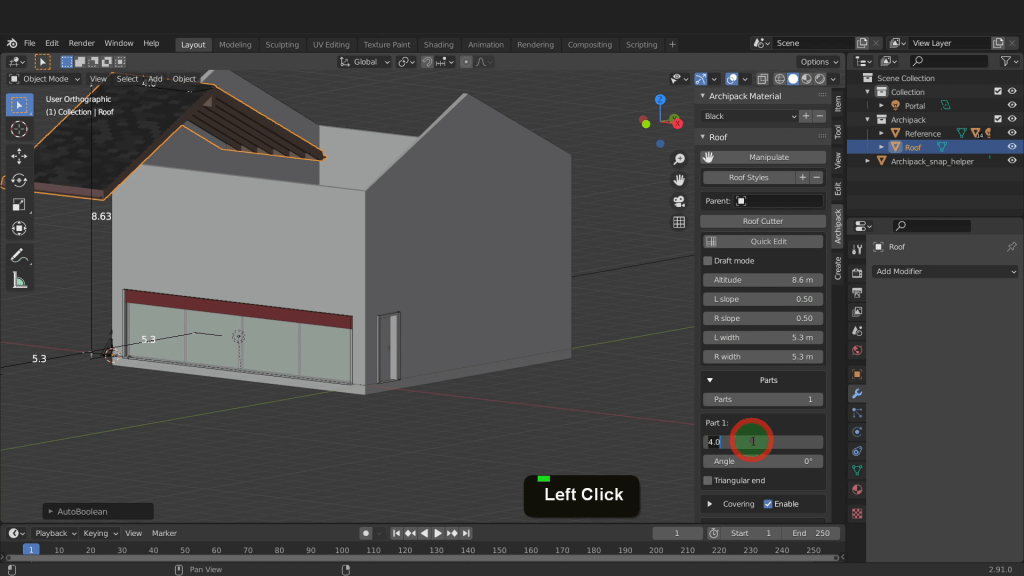
Expand the parts now and increase the length to 10.5. We do need to position this in the scene so switch into a front view. Open the item tab and in the X location adjust this value and drag the roof down a little. Press Numpad 3 and we can drag this back along the Y axis and centre it up on the walls. (Rotate Around). The roof has many more properties from the coverings, hip, gutters, fascia and barge board. These allow for a multitude of different styles to be created.
Back on the create tab there are more objects available. Lets add a fence. I can add this style. The part part then allow you extend the length of the fence. Rotate if necessary then modify each component.
Fence

I can rotate this 90 and now move this over to the side and position that there. Now that we have a double height wall lets add another window. This window here can be saved as a preset and added again. Here we can click the plus and in the name field I can call this Large Window and press enter and click ok. In the background a thumbnail will get created for this new object. Now back in the create tab.
Saving Preset

If we click window that preset large window is available here to select. In the snap menu change to vertex so we can snap and align with the first window. In the scene press G X press and hold Ctrl to activate snap and snap this across. Press G Z and position for the second floor. Left click and place that there. Now select the wall and on the add-on click boolean to create a subtraction. One wall object we didn’t look at and that was this draw option here.
Wall Draw

Click and select the first point then the second. This will create a wall. Useful method for adding walls. I can select just the wall and delete this. Next we have this truss object. This has many presets to choose from in the Archipack tab. I can rotate this 90 on the Y axis now increase the height to 9.8.
Truss

Press G Z and move this up here. Lets come back and add a stairs. I can choose this one here.
Stairs

Press G Shift Z to maintain its position on the Z axis and move this inside the building. If you wanted to preview this building in VR you could export to Twinmotion and start walking around very quickly.
There are a couple of things we need to do first. In the Outliner I can hide the visibility of the lights as we won’t be exporting these.
Also let’s come to the scene tab and expand units.
Scene Units

When importing objects into unreal or Twinmotion we need to reduce the scale to 0.01 and match the centimetres unit used by those engines. That reduces everything in this scene down so we first need to scale everything up. Let’s switch to wireframe shading. Drag select all of these objects and press S input 100 and enter. We can switch back to solid shading. We can see we have a clipping issue because of the change in scene scale.
Camera Clipping
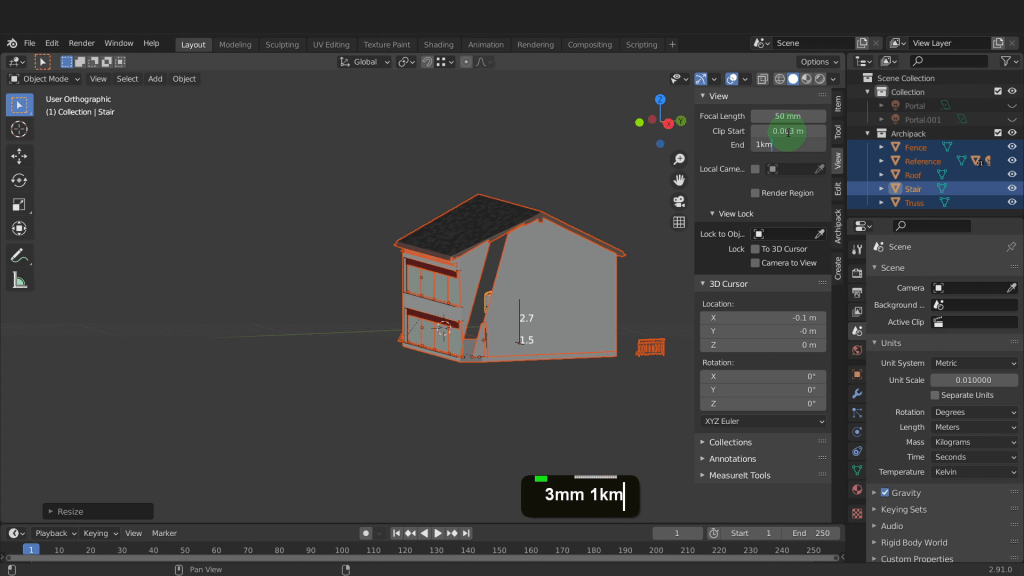
In the view tab lets increase the start clip to 3mm and the end clip to 1 km. That fixes that issue. We also need to apply the non uniform scale. So press Ctrl + A and apply scale. I can select this reference object and press H and hide it. Now we can export all these objects. First switch back to wireframe shading so we can make sure we are selecting everything. Drag select all of these.
Export

Press F4 and from export choose FBX.
Navigate to a folder where you want to save this file put a check Mark in selected objects. So only the selected objects will get exported. In geometry we can set this to face smoothing. The rest of the defaults are fine.
Export Settings
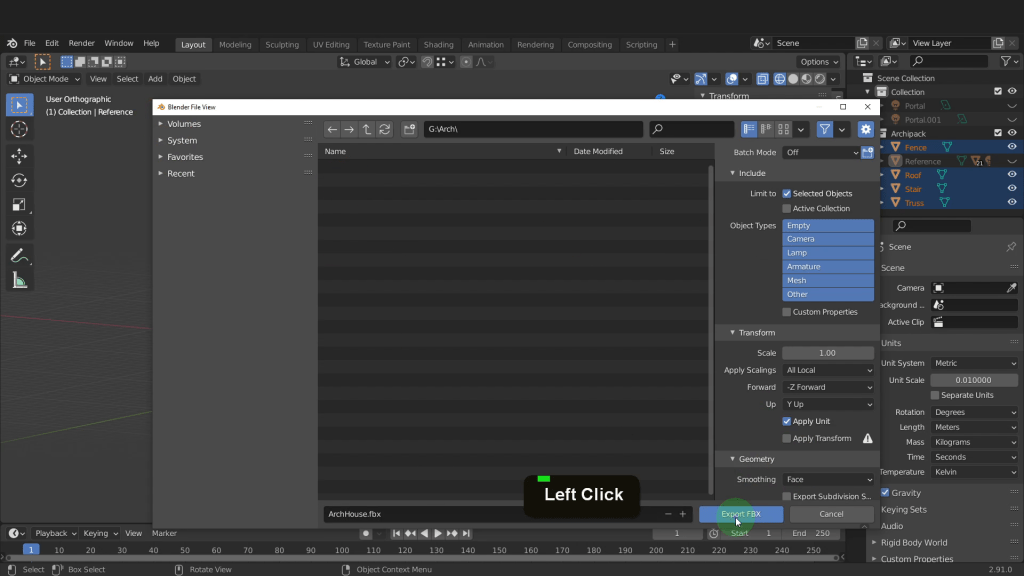
I can name this Arch_house and click export fbx. We are ready to launch Twinmotion. This will take a moment to load. When it does I’m in the default scene.
Import
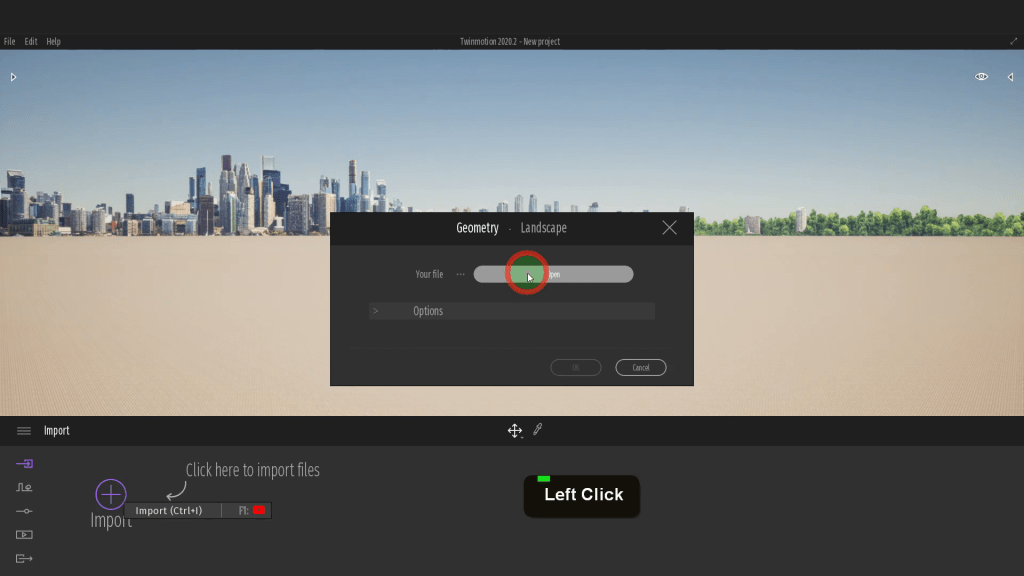
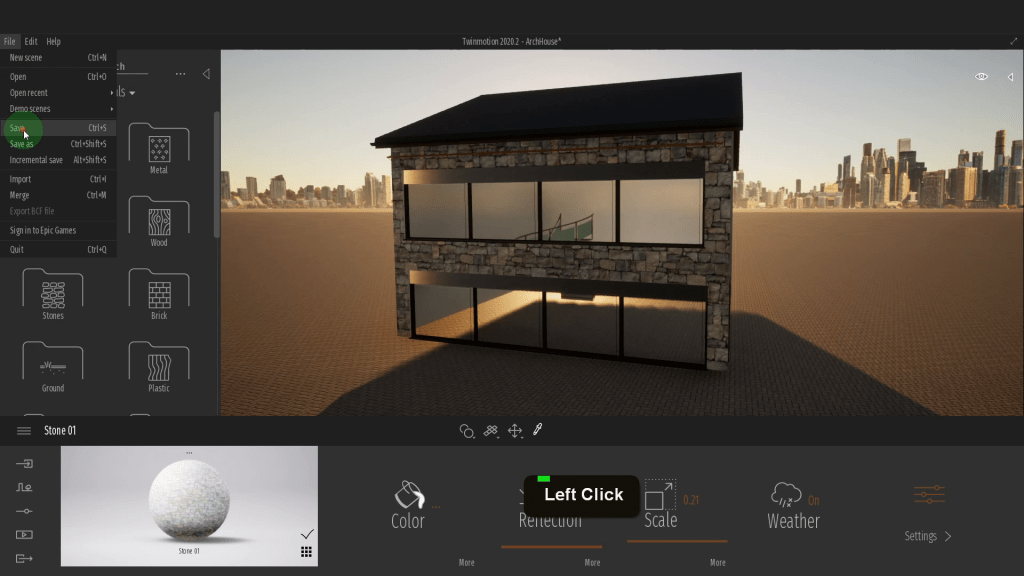
Click import and now click open. Navigate to where the FBX was saved. Click open. The default import setting will be fine so click ok. Use W, S, A and D to navigate around. Press the S key and just reverse back here and come around to the front of the house. One great thing about Twinmotion is the library of materials that’s available.
Glass Material

So if I click into glass folder I can drag and drop the glass material onto the windows. Now one thing we notice is the house model is down in the ground. The reason for this is its below the grid in blender. So lets look at how you can make changes in Blender and update them here in Twinmotion. Lets open back up Blender. Press Numpad 1 for front view. Press g Z and drag this up and sit on the grid floor. With that in position press Ctrl + A and apply all transforms. Press F4 and we can export this fbx again. Select the previous fbx we exported as we want this to overwrite that export with the new changes in location. Click selected objects up top here. Now in geometry we can switch smoothing to face and export fbx. Open back up Twinmotion.
Re-import

Come to the import tab and just click this refresh icon that appears when you hover the cursor. That will reimport the model with the changes we made in Blender. This wall material doesn’t look quite right. The reason for that are this needs a UV map. In fact any object you want to texture in Twinmotion will need a UV map. This one needs updating. Let’s open back up blender and select this wall object. We can switch into the UV editing tab up top here. I can zoom out. Open the view tab and just increase clipping distance to 1KM. We can do a quick UV unwrap here. Select it all and press U and choose smart UV project.
Smart UV unwrap

Increase the island margin to 0.02 and create space between the islands. The smart UV project method can be useful for a quick unwrap but you will usually need to spend some time and improve this unwrap. Now in the UV editor I need to rotate these 90 to better orientate them and take a texture.
UV’s
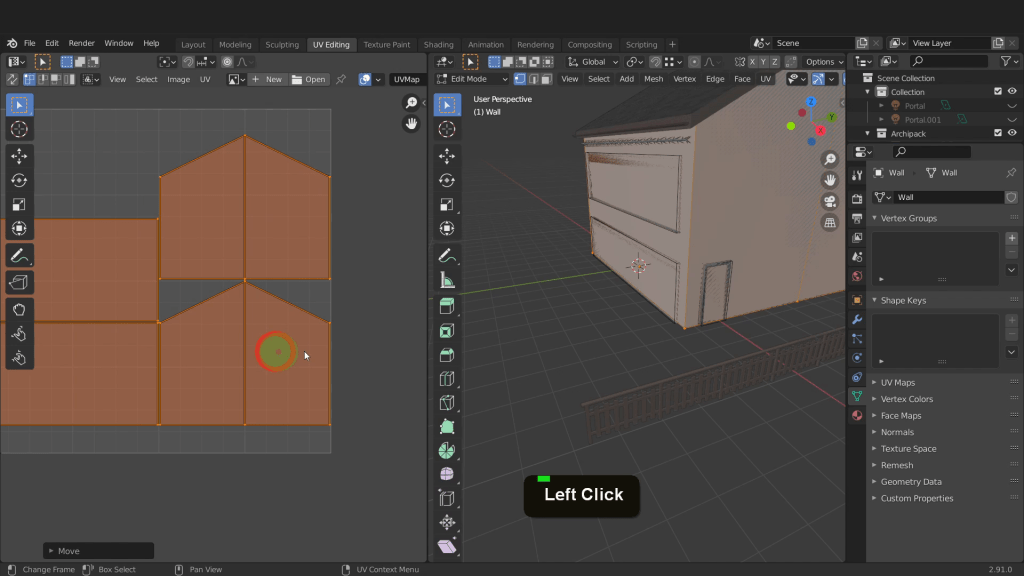
Now move them onto the UV grid and make sure they are within its bounds. Lets open back up the layout tab. Dag select everything. Press F4 and from export choose fbx. Navigate to where we had the original fbx file saved. Select it so we are overwriting it. Enable selected objects and I can update the smoothing setting. Now export fbx. I can open back up Twinmotion. Now in the import tab reimport to update those settings. Use the picker to select that material and adjust the scale.
This is a really cool tool to quickly preview different materials and looks for your projects without too much work.
Twinmotion Model
And now once you save the file you can import the scene into Unreal engine with the materials applied. This is still in beta stage but works well. The add-on is available from the Unreal marketplace and you’ll find all the information there to install and get up and running.
Unreal Scene
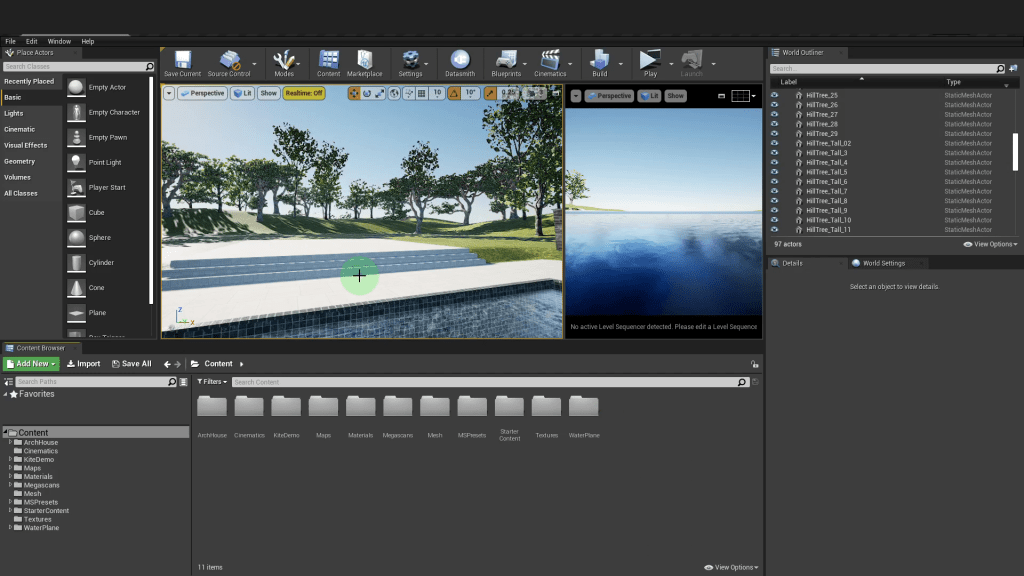
I can open Unreal. This is a scene I have from a course on Udemy and you can find out more by following the link here.
Open Datasmith

To import the Twinmotion scene come to Datasmith. Navigate to where I have that Twinmotion file saved. Here I can click open. It will ask where to save it and content folders will be fine. Next it wants to know what to import. I can leave the defaults. It’s really just geometry material and textures so I can click import. That imports and throws the camera right out into space. In the Outliner I can select an object and in the scene press F to zoom into it. These are grouped in a folder so by selecting the folder you can rotate and move the model into position.
Finish
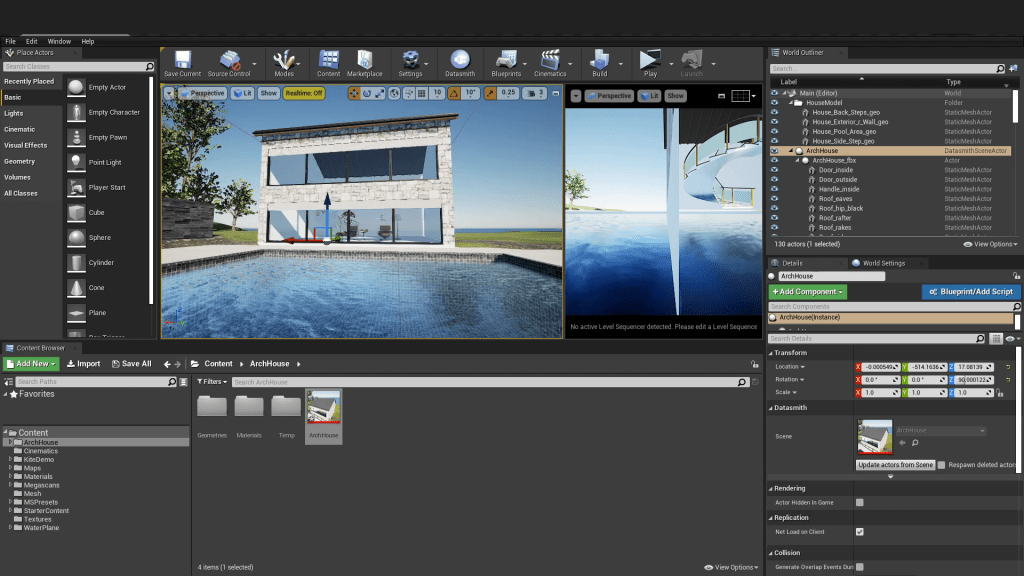
This is a very fast way to work and get things setup between blender Twinmotion and Unreal engine without very much work and that’s where I can leave it.
For more detailed Courses Check out my Blender Unreal Architectural Course on Udemy Here.
