Check out this course on Udemy here and get a discount on the advertised price!
Take the CourseWhether you are creating a game or animation asset in Blender this course will guide you step by step through the process of creating an asset for use in a game engine such as Unreal engine or the Unity game engine. In the following post I outline the process we follow in this course.
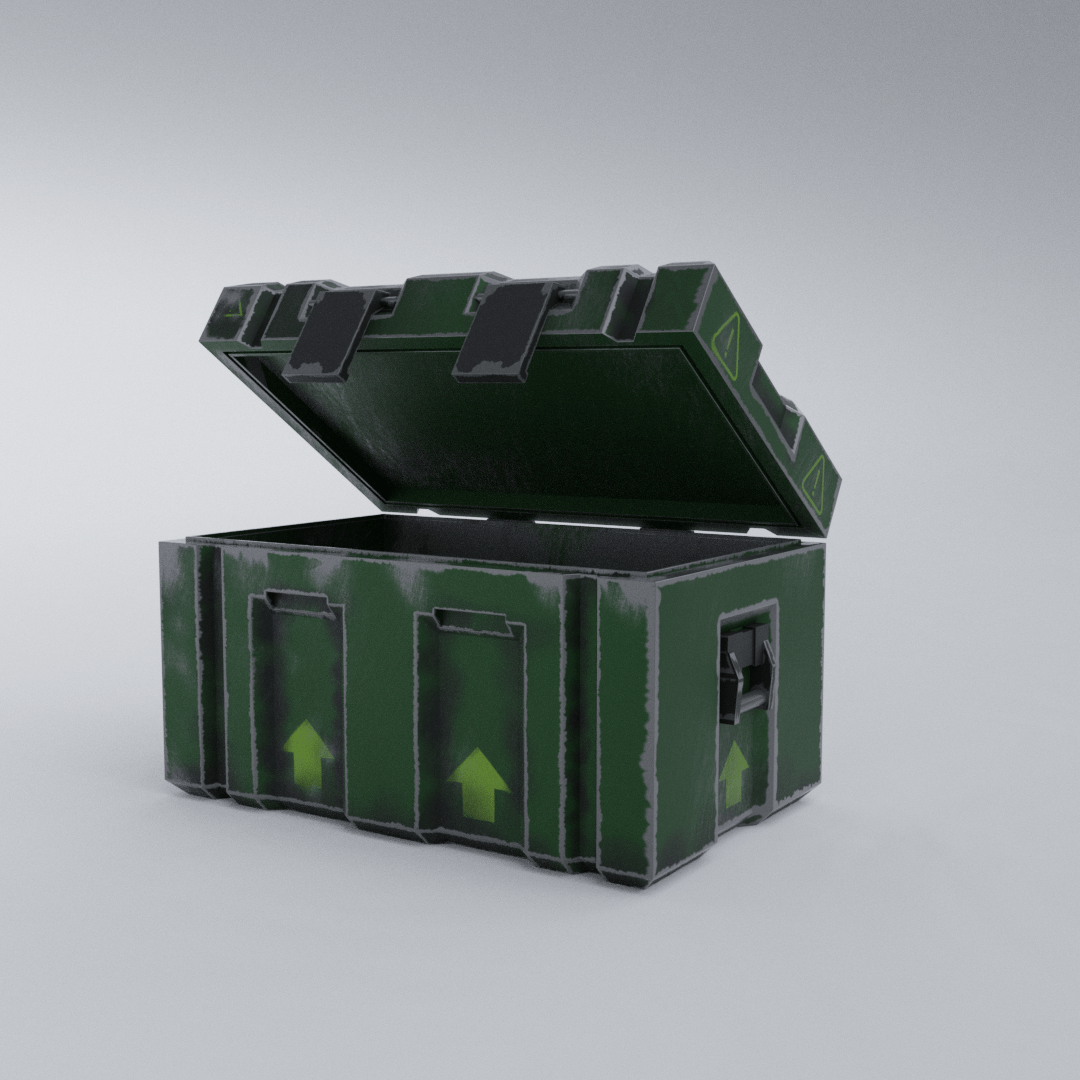
The process involves using the great tools available within Blender to model, UV map texture, rig and finally animate so get a game engine ready asset.
During the course we use the tools available in Blender that will help speed up our workflow including loops tools, symmetrize and mirror modifier. In addition to that to that we try use many of the short cut keys to get the asset modeled quickly and get students into this great habit. One of the goals with this asset is to maintain good quad topology and try reduce or eliminate any issues that may arise during UV mapping and texturing.

Once the modelling is complete the next stage is to check the mesh and begin the clean up. This involves removing doubled up vertices, ensuring good edge flow and ensuring no tri’s (three sided faces) or Ngons (more than four edges) have been created during modelling. Doubles can occur by accidental duplication or when objects are combined and overlapping vertices have not been merged.
Finally we need to ensure all non uniform transformations have been applied. This should have been done before modifiers such as the bevel modifiers are added to an object. Without applying an objects transforms first these modifiers will not give accurate results. For subdivision surface modifiers now can be the ideal time to apply these so the UV mapping can begin.

UV mapping
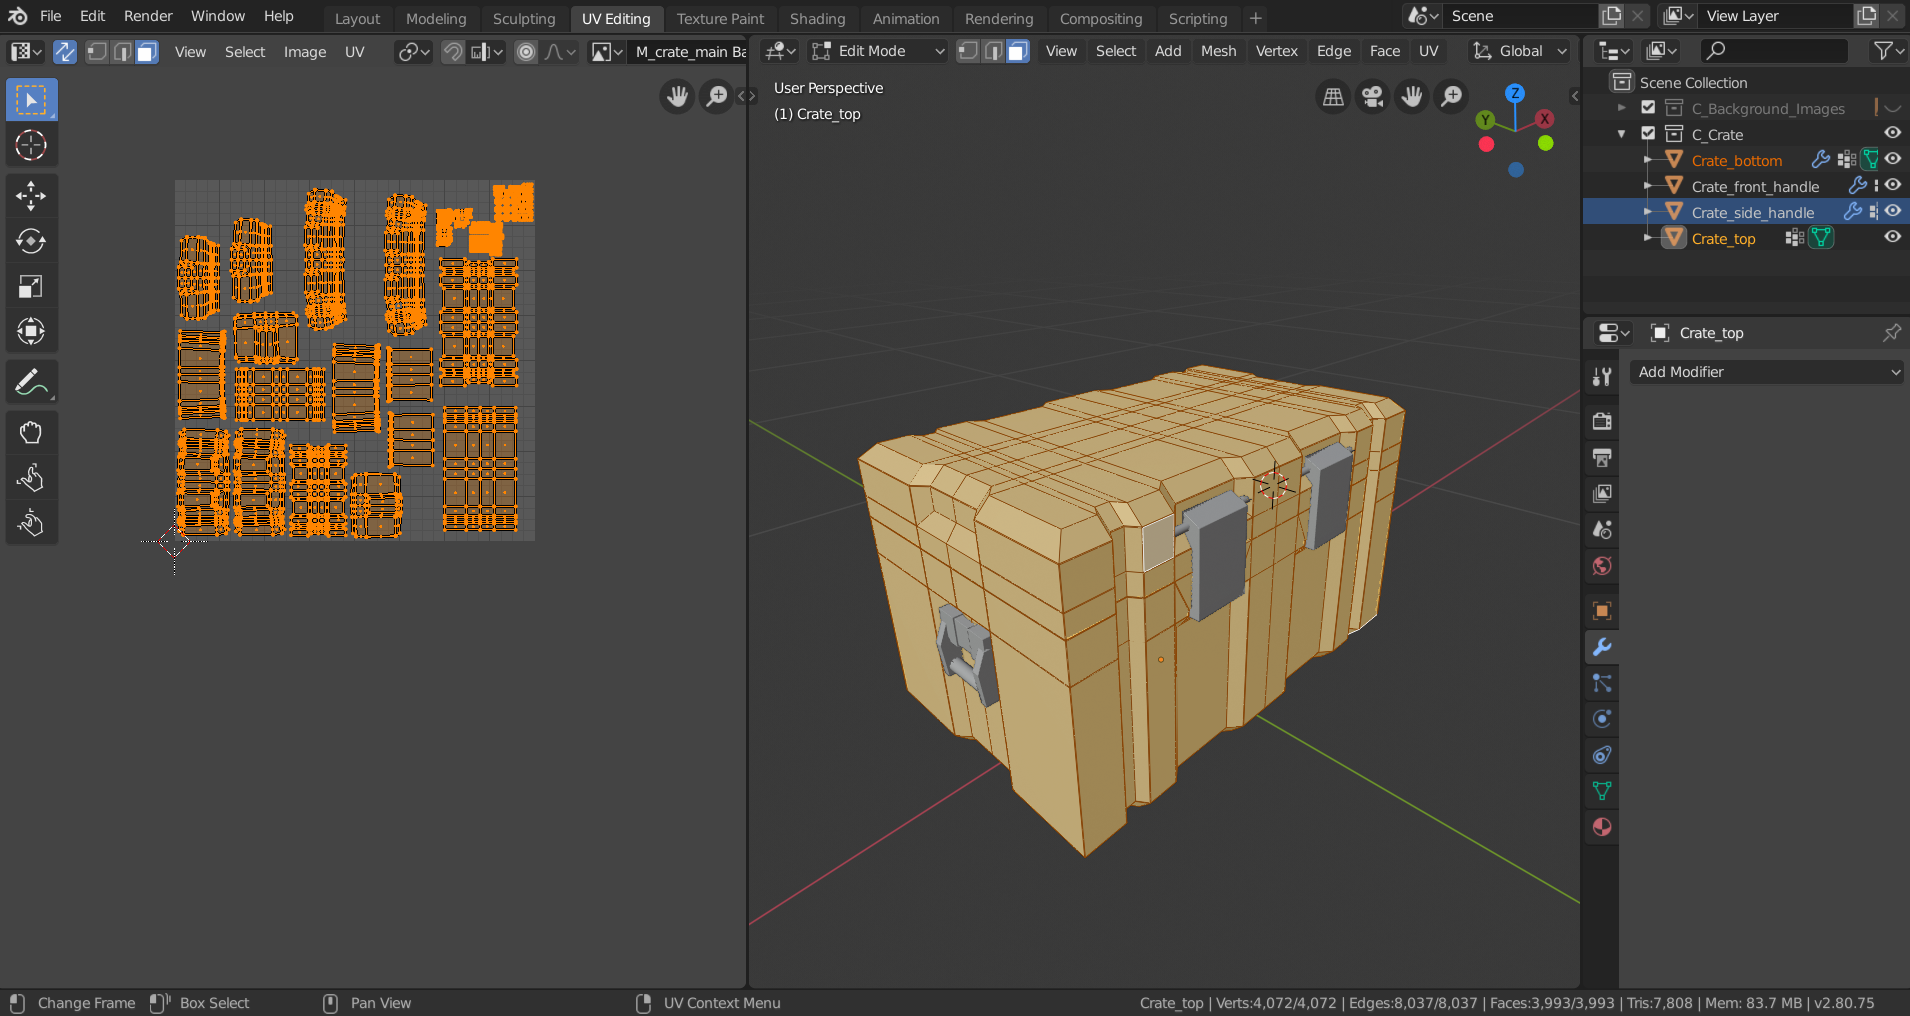
Blenders new work space system makes getting setup much easier and ultimately makes UV mapping a more pleasant task. Once you switch layouts into UV editing, Blender automatically switches into edit mode and you can immediately begin the unwrapping process.
One of the goals when creating this asset and to get an efficient mesh was to combine any parts of the mesh that could work together. This can help make full use of the UV space while also reducing the number of textures we need to create and import into the game engine.

Combining Objects and UV’s
Here are both the top and bottom mesh combined together to maximise use of the UV grid. This makes sense with different parts of the mesh will share a similar material. This has benefits when texturing and helps reduce the number of texture maps we need to create.
Baking texture maps in Blender
Normal maps are a way to add extra detail to an object without using extra geometry. When creating game assets one goal is to create low polygon asset for faster rendering in game. Baking normal maps in Blender involves baking the detail from a high poly object and transferring this to a low poly object using a normal map.

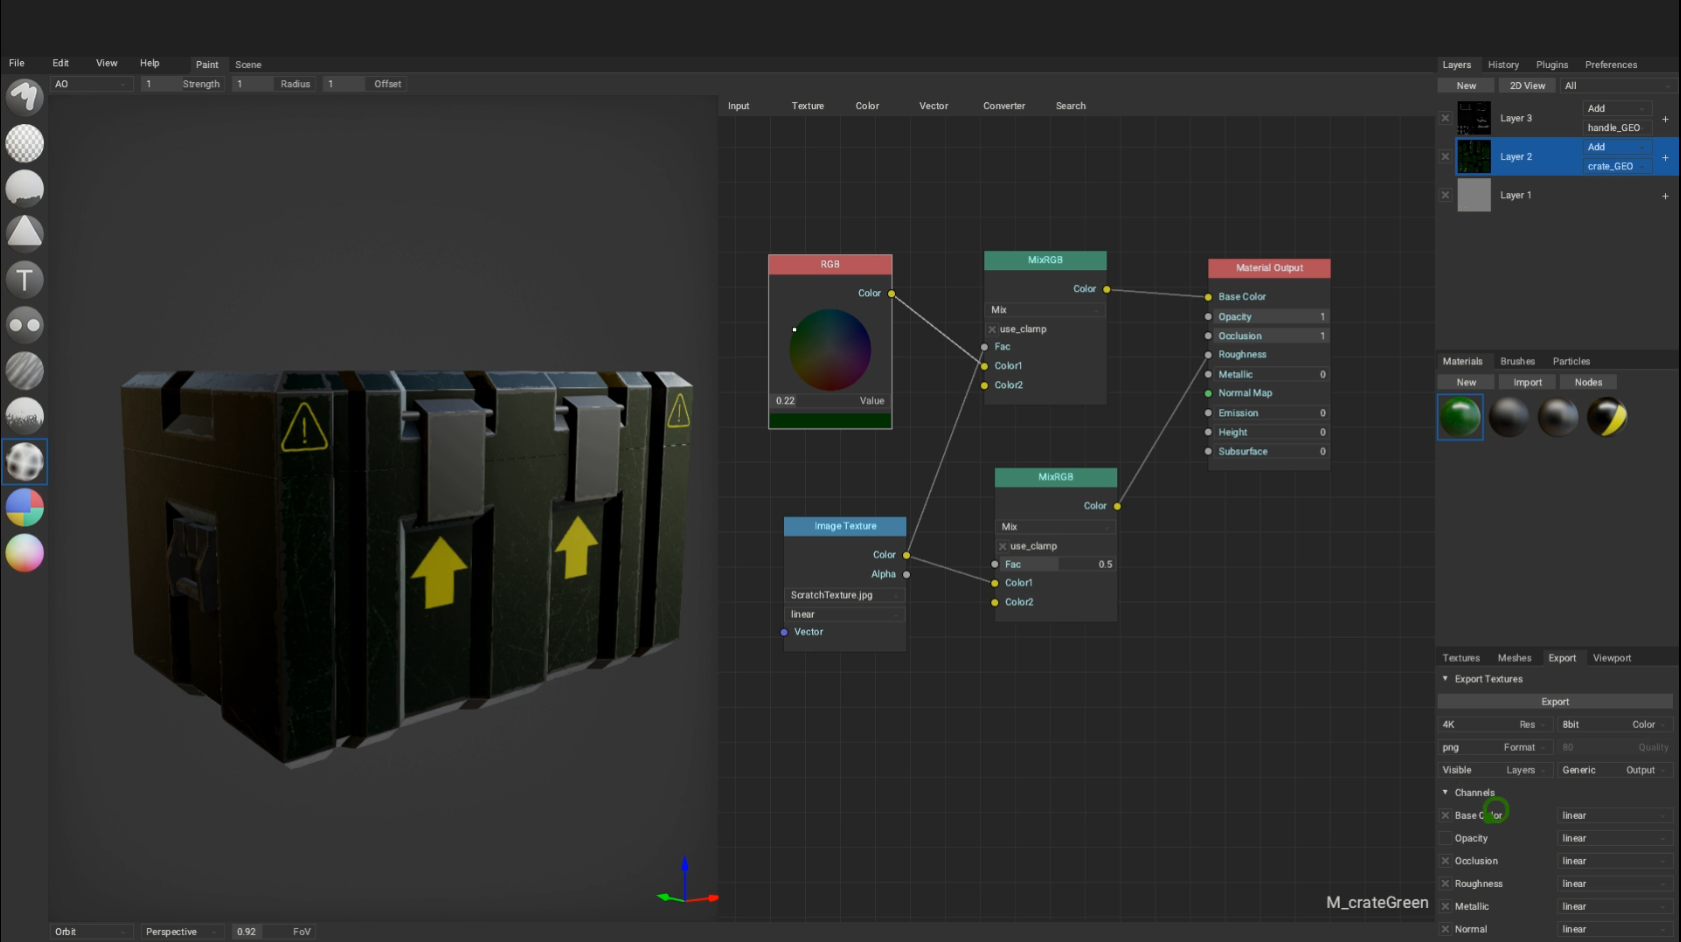
The new texturing space layout in Blender builds on the previous version where you have the ability to texture paint directly onto the mesh. In this course we paint colour and roughness maps for use in the material in both Unreal engine and the Unity game engine.


Texturing in ArmorPaint
ArmorPaint is a physically based texture painting application that lets you texture your models with an easy to use interface. These PBR textures can then be used in game engines such as Unreal engine and the Unity game engine.
Rigging & Animation
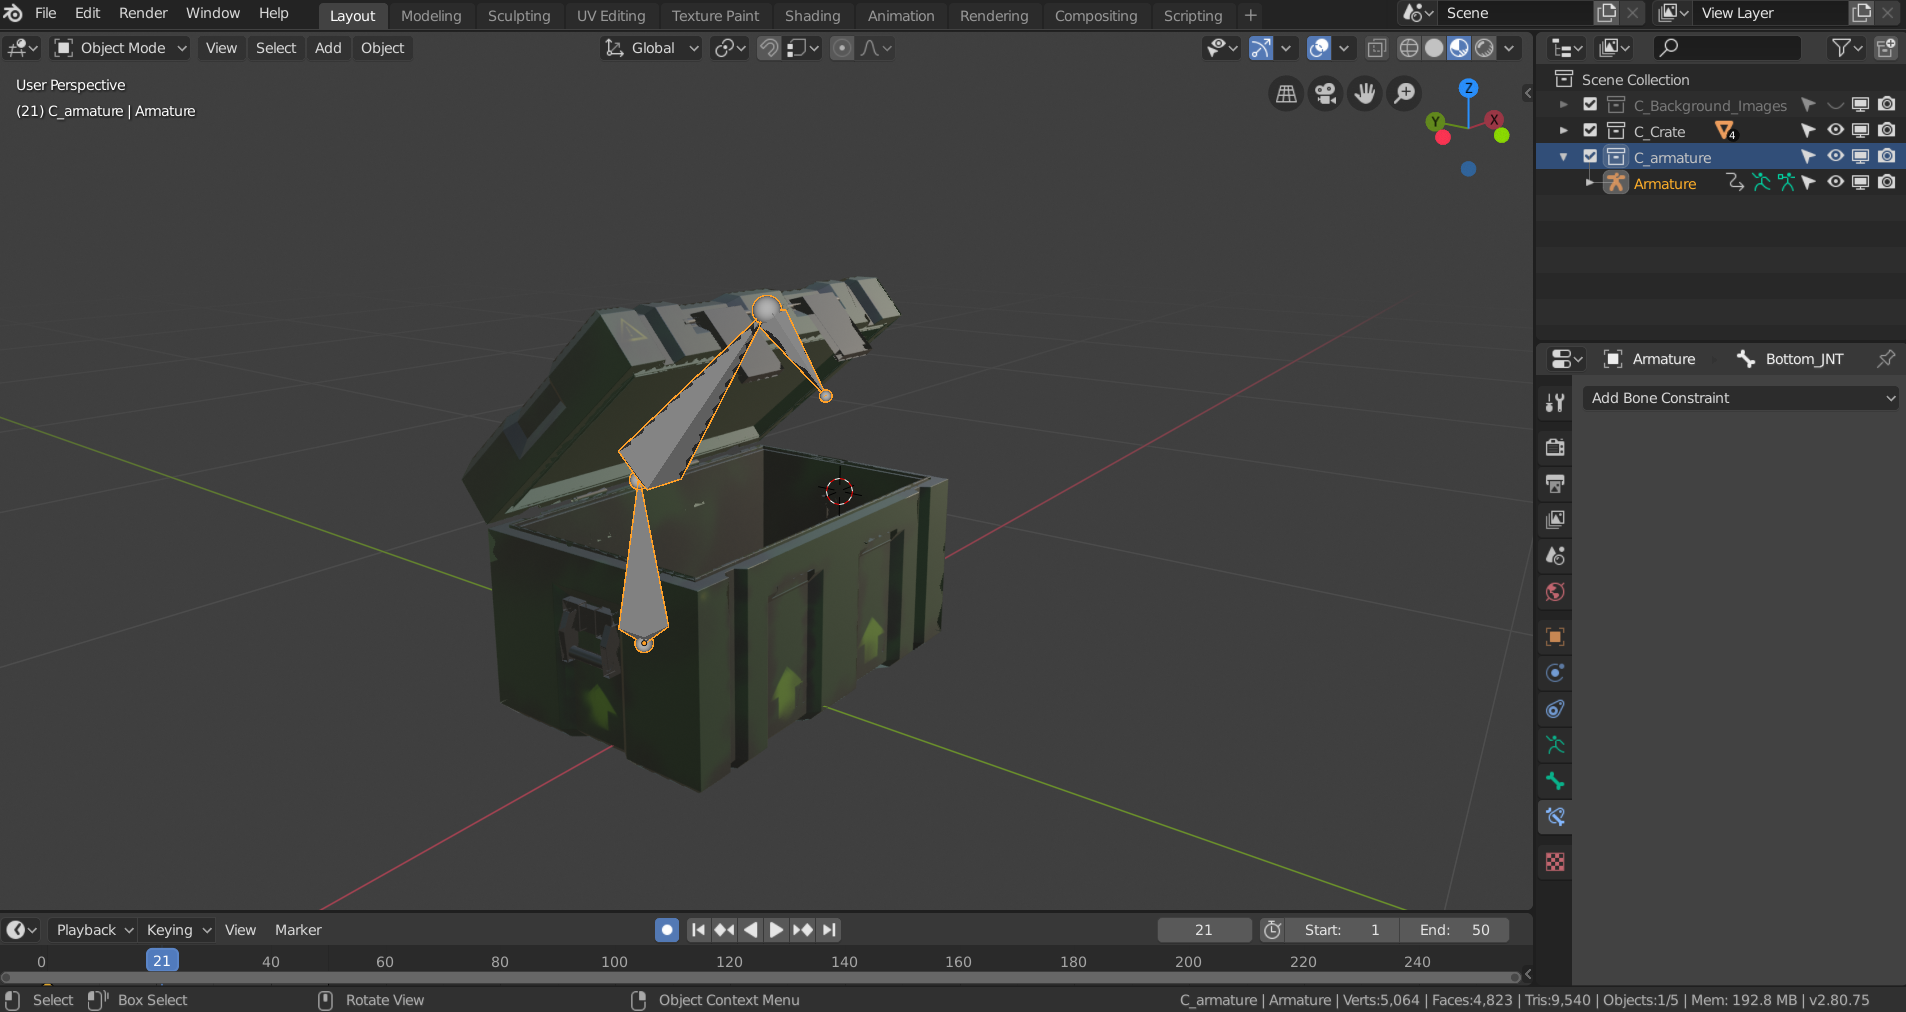
Using Blenders rigging tools we add an armature and weight paint these to the different objects they are to control. The goal is to position the pivot points of the joints so the rotation of the objects is accurate. We move on into the animation work space and create a crate opening animation. When we export the crate as an FBX this animation will get exported with it.

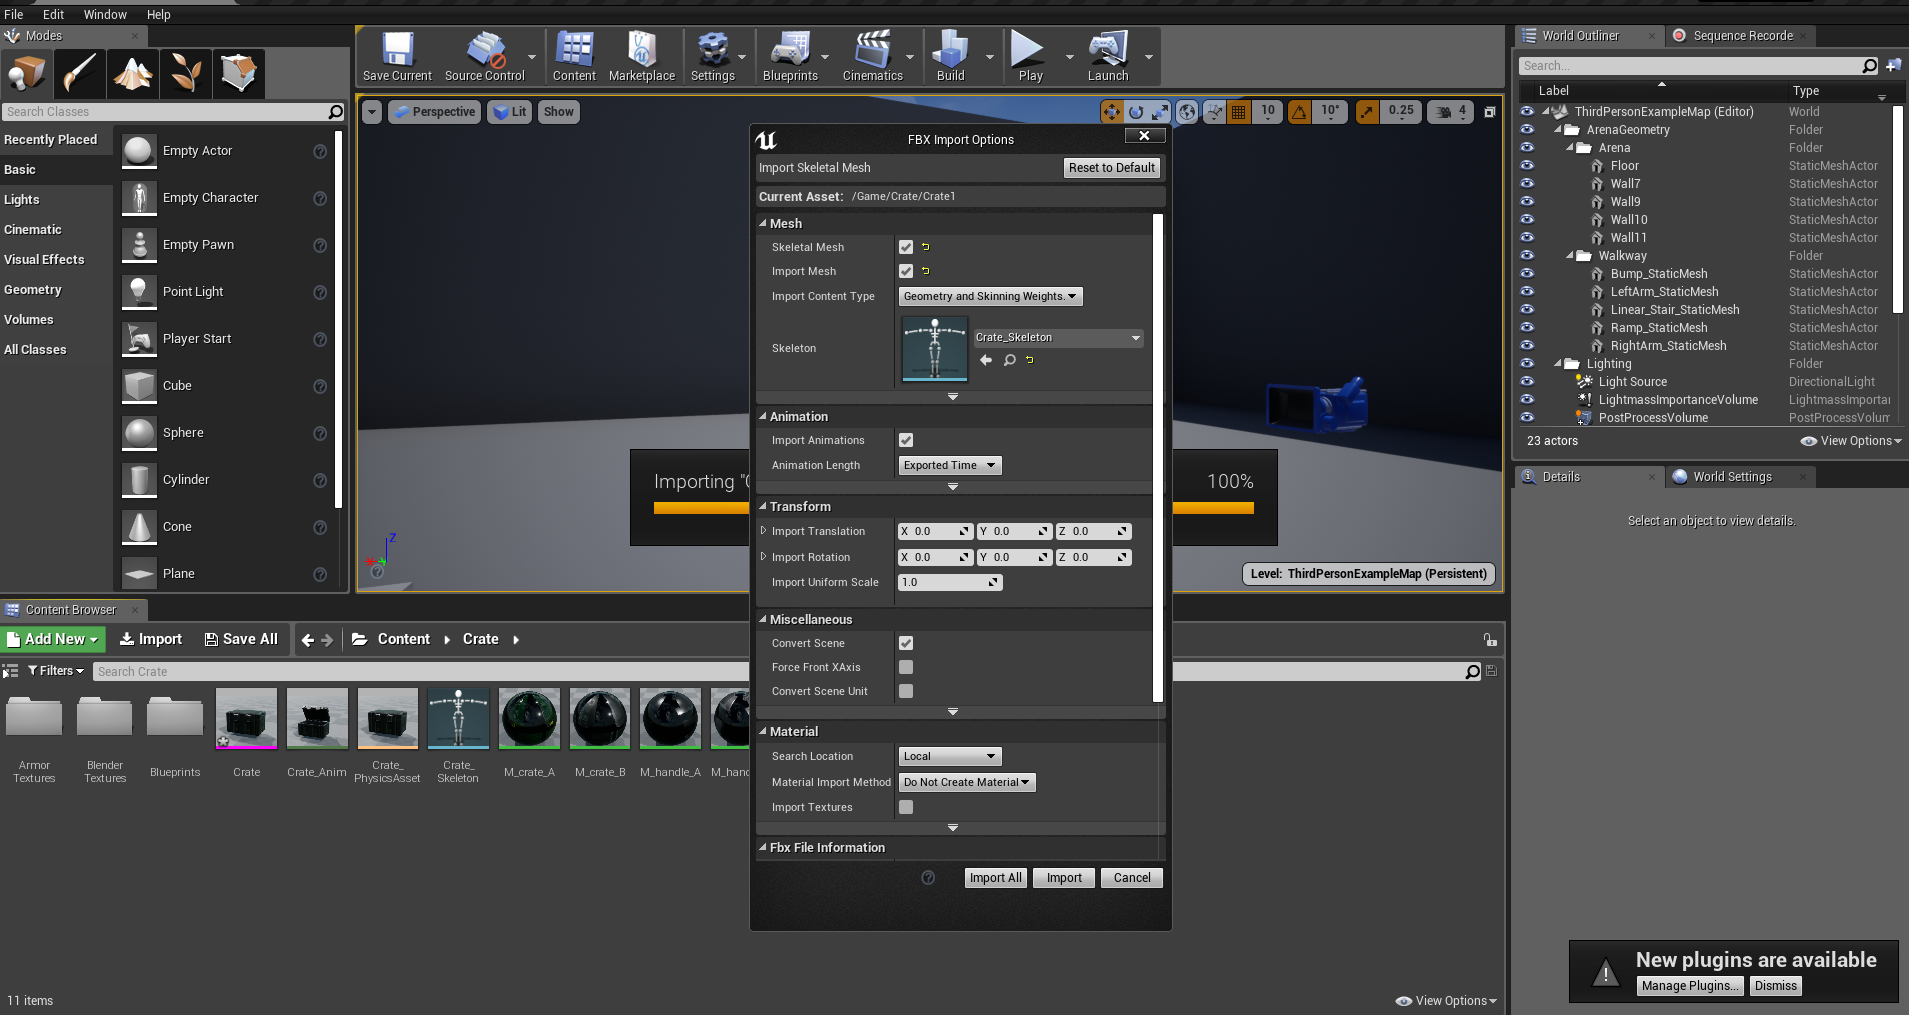
Importing Asset and textures to Unreal engine
We follow the standard procedure when importing rigged assets into Unreal engine. There are different options available when importing your asst and we import the asset with the animation included.
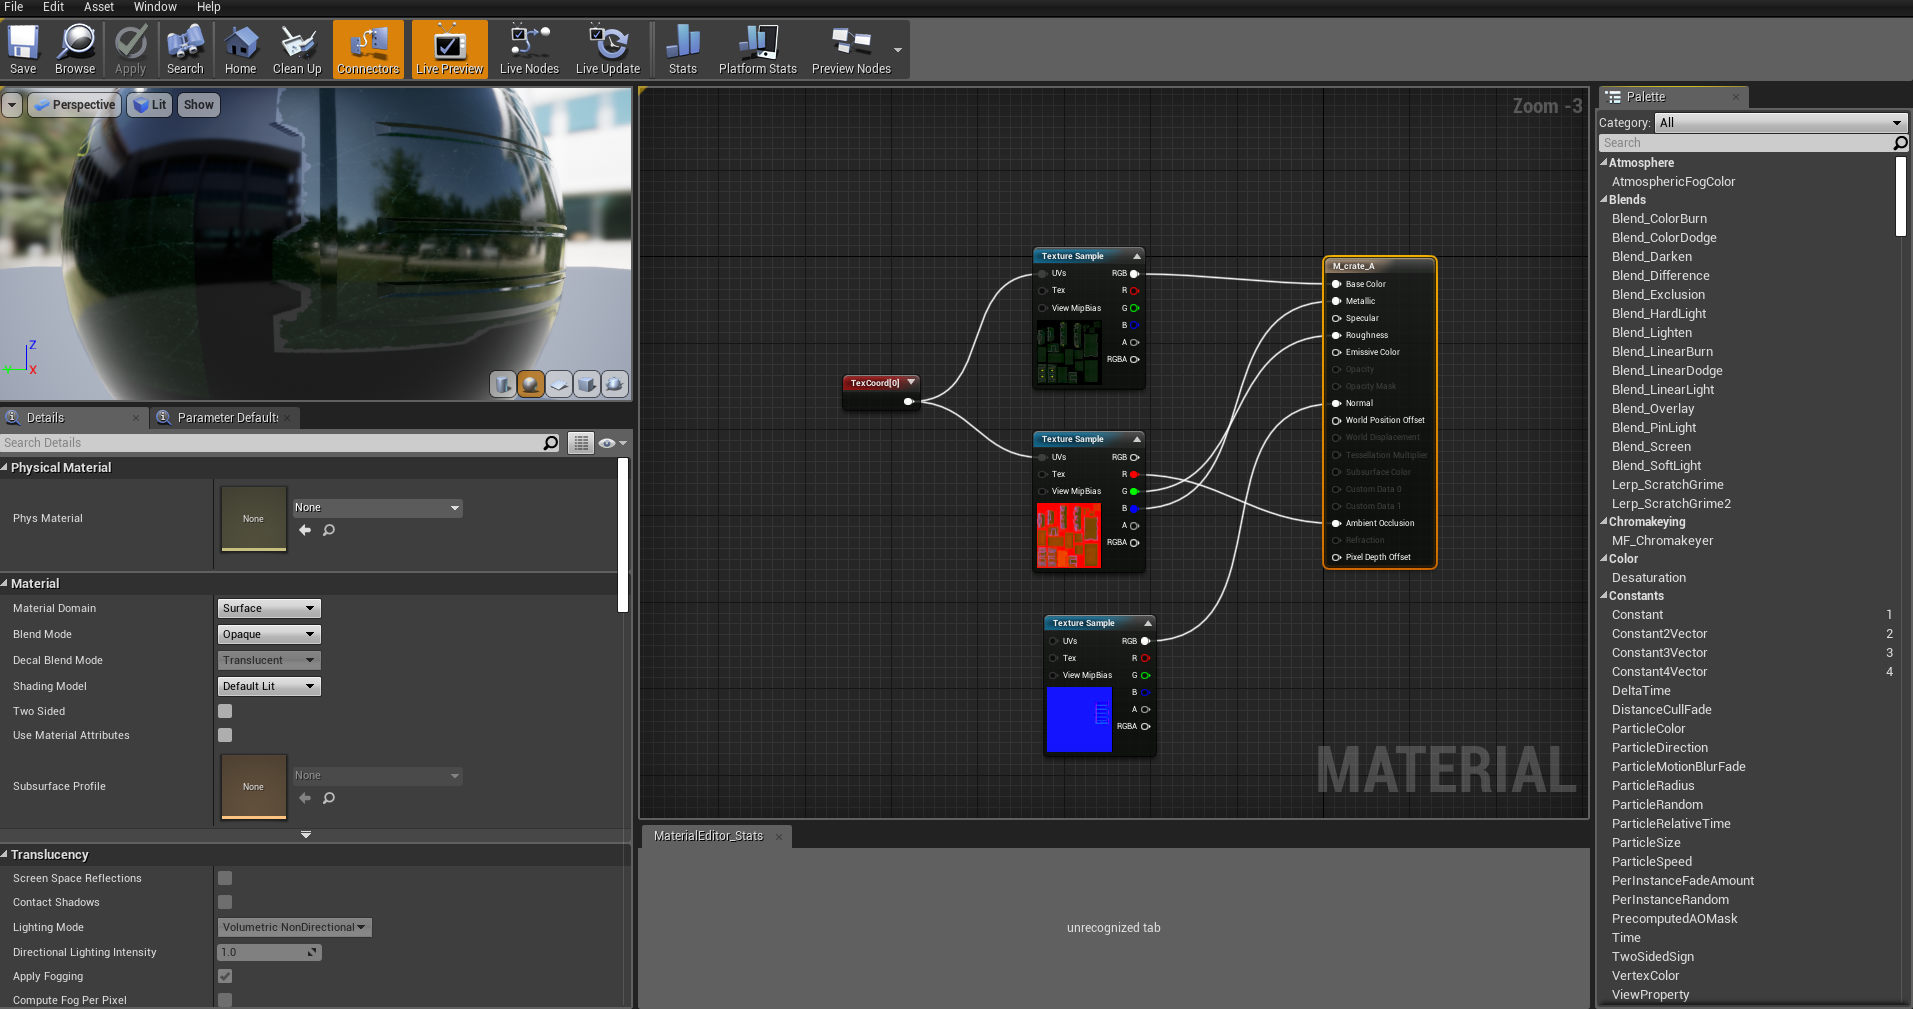
Creating Material
Using the texture maps we created while texture painting in Blender and ArmorPaint we create some basic Unreal materials for the asset. These material can then be applied to the asset in game.
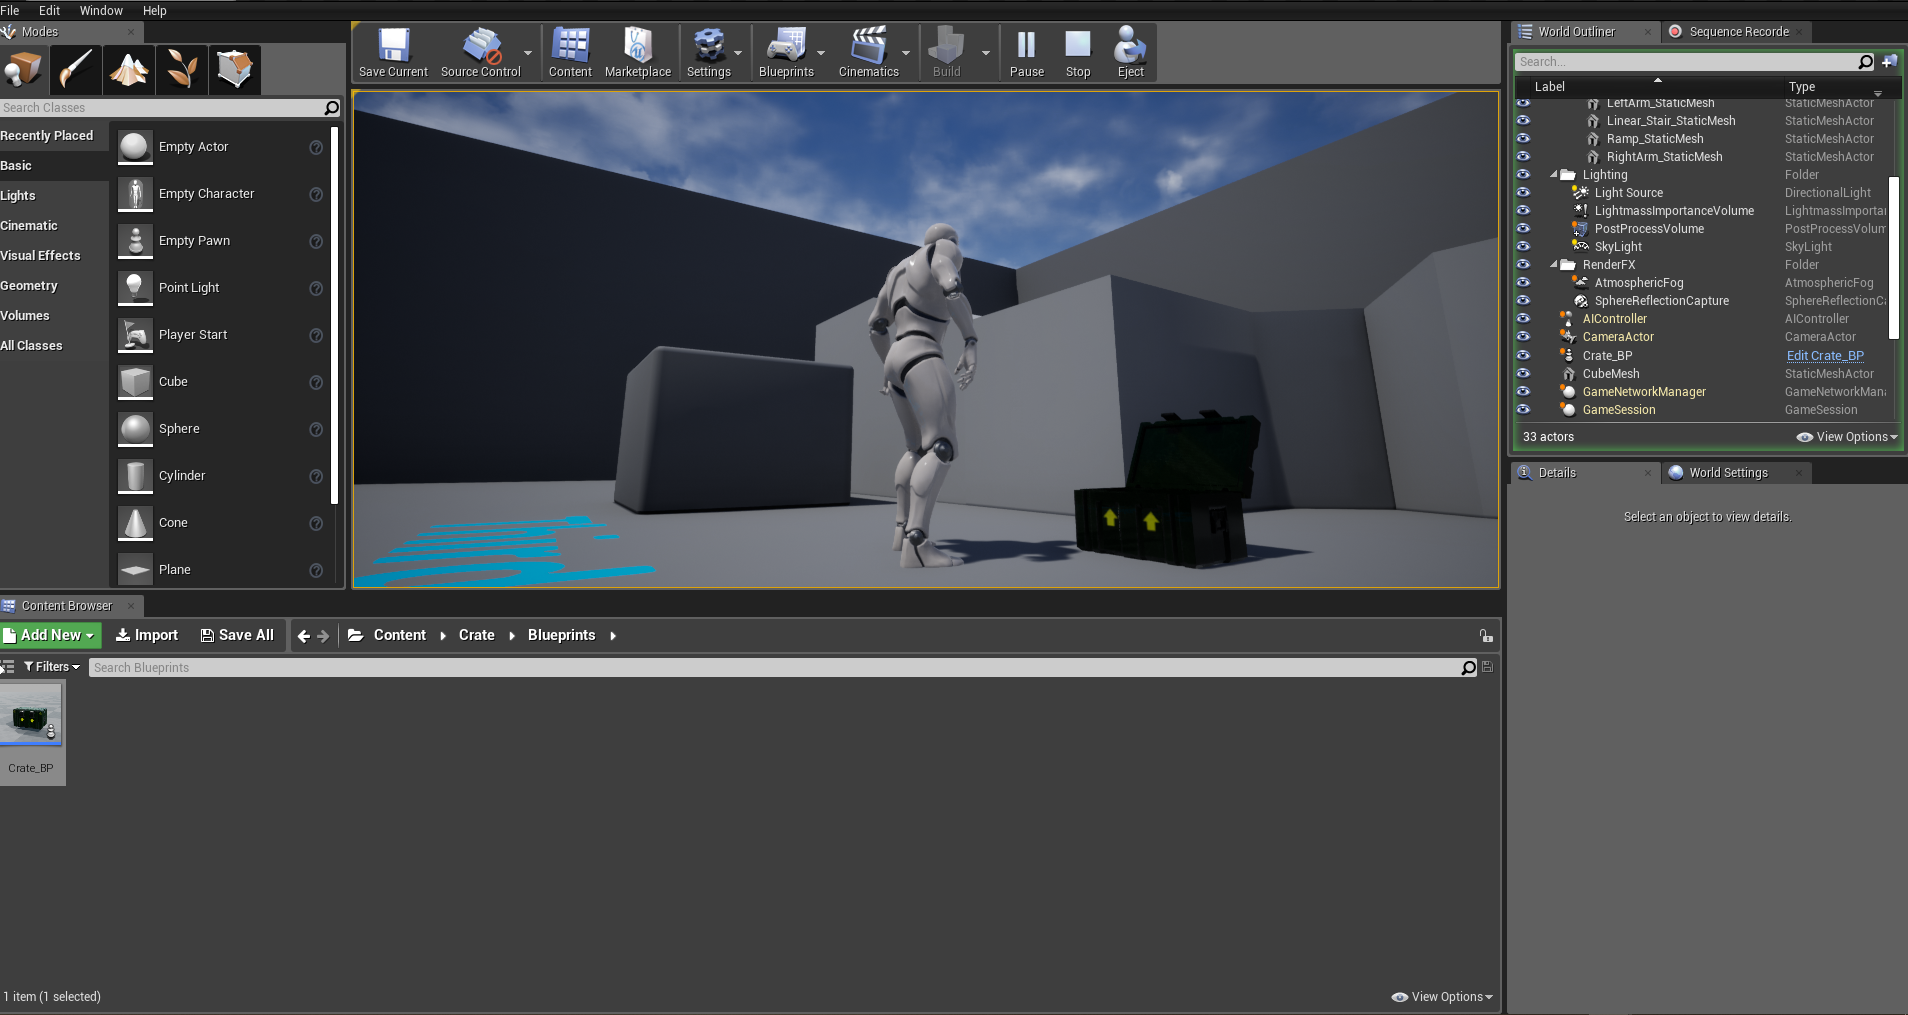
Creating Blueprint
We create a very basic blueprint to play the crate animation when a player overlaps with the asset in game. This test shows the power of using blueprints to quickly test if an asset will behave as expected in game.

Check out this course on Udemy here and get a discount on the advertised price!
Take the Course