Setting up the Archipack add-on in Blender
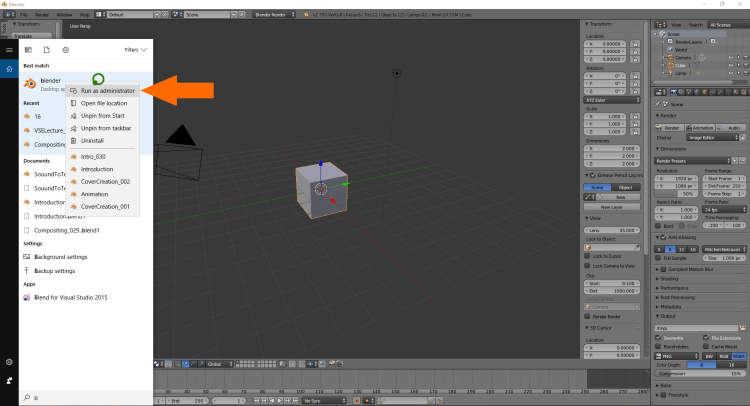
Getting started with Archipack you need to run Blender as an administer. This will allow you to render the thumbnail images for each of the structural elements. So what I normally do is from the search menu on my windows desktop, type in blender, and when it appears right click and choose run as administrator.
Enabling the Archipack add-on in Blender
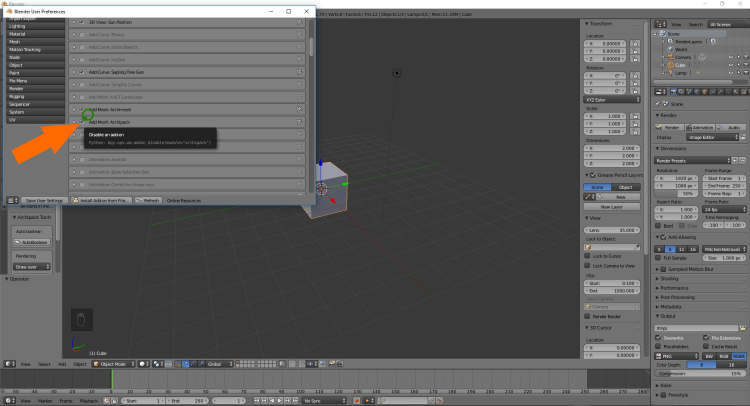
The next step is to go to file > user preferences and in the add-ons tab you can enable the Archipack add-on there. Simply put a check mark in the box and save user settings.
Download the Default Material Library
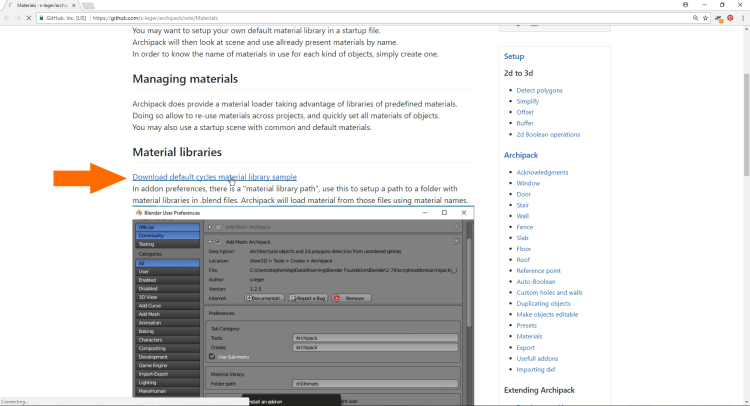
The next step is to download the material library. This way any object added to the scene will have a material node setup for each of it’s elements. So for example the glass element of a window will have a glass material setup, while the frame element will have a PVC material setup. Go to Archipack’s Github page and download the default cycles material. The material is a .blend file.
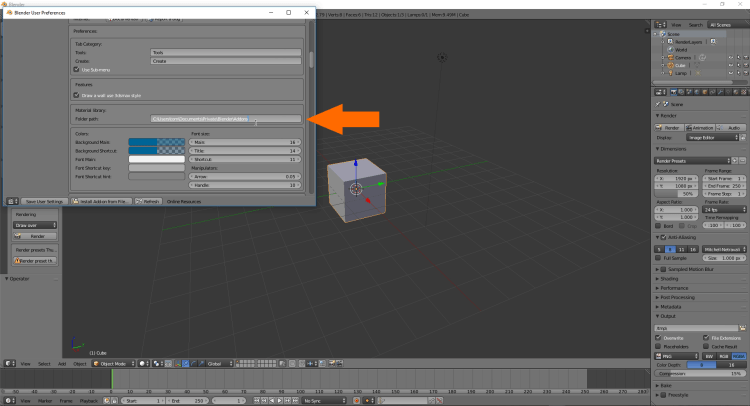
Save the download and Link from Blender
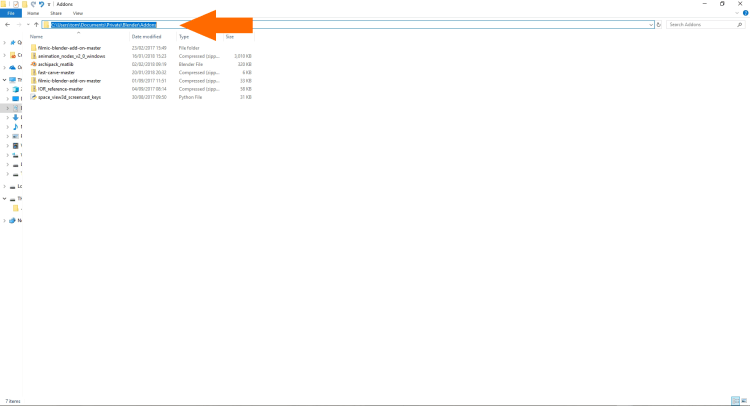
The next step is to save the download to a permanent location. One you will not be changing the path or location. Copy the path to this folder and paste it in the material path of the Archipack add-on. Save user settings. Now when Archipack elements are added to the scene they will have a material with a node setup.
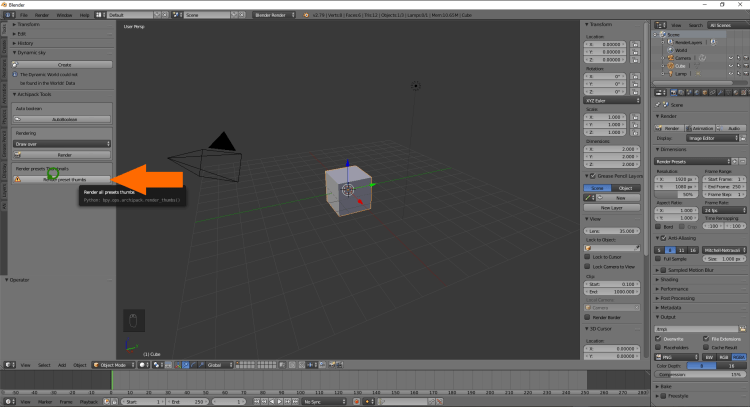
Rendering the Archipack thumbnail images in Blender
Open the tool shelf (shortcut key T) and from here you will want to render the preset thumbnail images of each structural element. It’s as simple as clicking the “Render preset thumbs” button. This may take a couple of minutes to render the images.
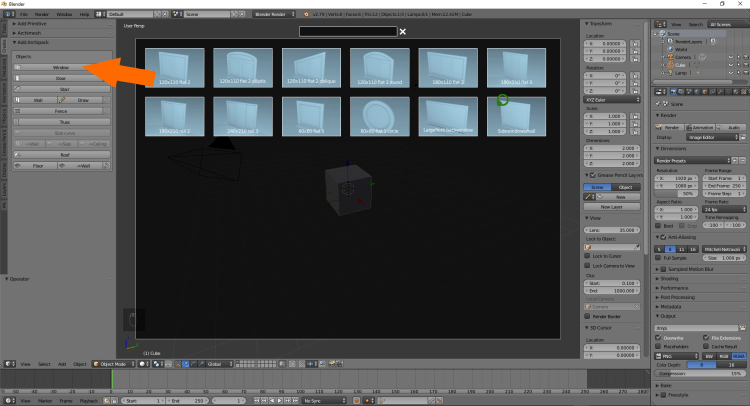
Adding 3D elements from Archipack in Blender
Once the images have been rendered you can view them by going to the create tab, and to the Archipack add-on. Here if you click on the windows object for example you will see it now has a rendered thumbnail that weren’t previously available.
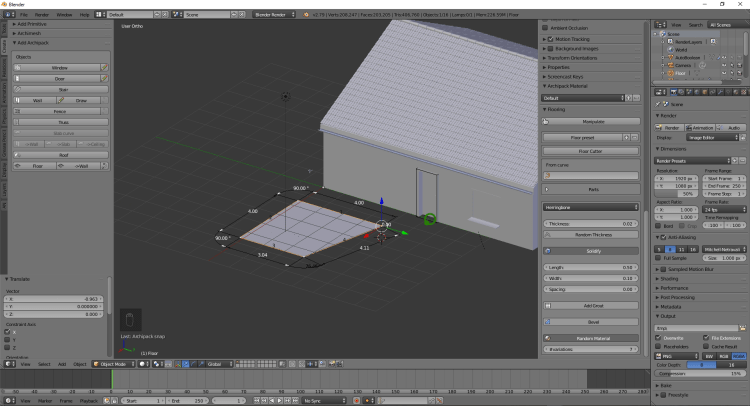
Wall elements in Archipack
When you add a wall to the scene it gets added at the position of the 3d cursor. You will find the properties relating to this wall element on the properties shelf (Short cut Key N). Here you get to adjust the properties of the wall. Increase the number of walls, adjust the width and height, adjust the angle of the wall or change the wall from straight to curved.

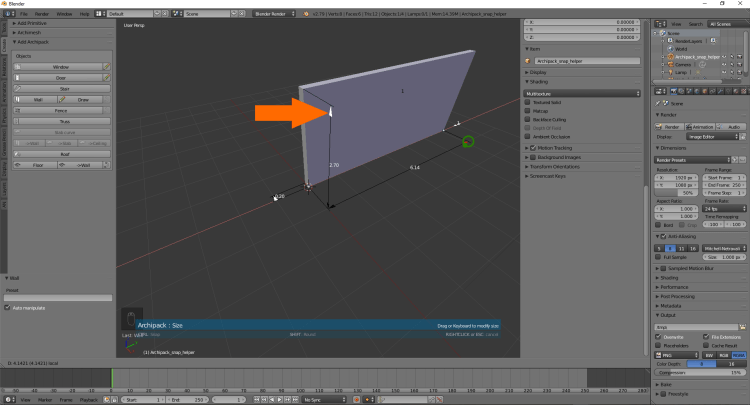
Dynamic dimensions in Archipack
In the 3D view each object id added to the scene with dynamic dimensions for the user to manipulate. Simply select the white arrow of the dimension and adjust it to the length you require. I find using the snap during transform works very well in conjunction with these arrows.
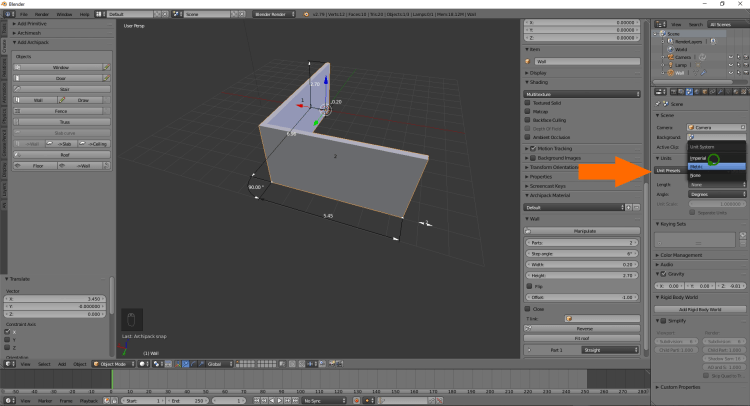
Changing the Units of Measurement in Blender
To change the units of measurement displayed go to the scene tab on properties editor and change the units of measurement. In the image below I change them to metric. This will update the elements already added to the scene.
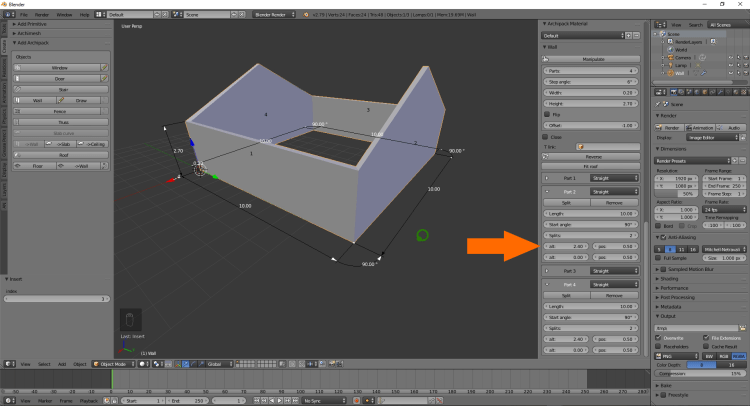
Manipulating wall objects in Archipack
Each individual wall section have properties relating to that element and can be adjusted to suit your design. These allow you to increase the length of a wall, adjust the start angle and you can increase the splits in each wall. Increasing the splits is basically subdividing the wall by adding additional edge loops. This gives you greater control to manipulate the wall into more useable shapes. In the image below increasing the split number on wall number two and wall number four allows the creation of gable ends of the house for example.
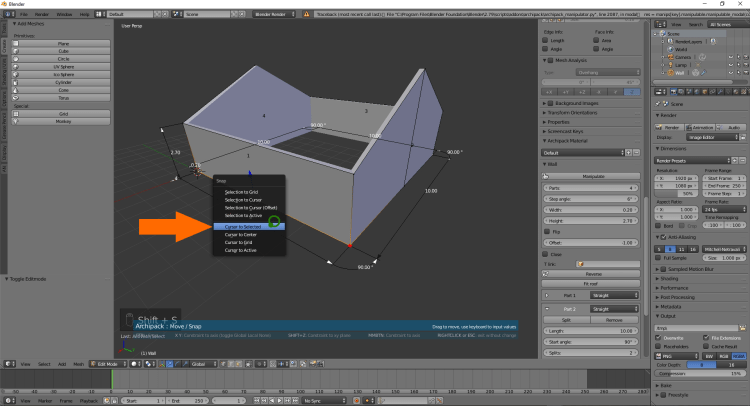
Placing the 3D cursor
Adding doors and widows is very easy. I like to place the 3D cursor into position first then add an element such as a door or window. That way it is on the same plane or level as everything else in the scene. In this example I tab into edit mode, select the two end vertices of the wall and place the 3D cursor between them.
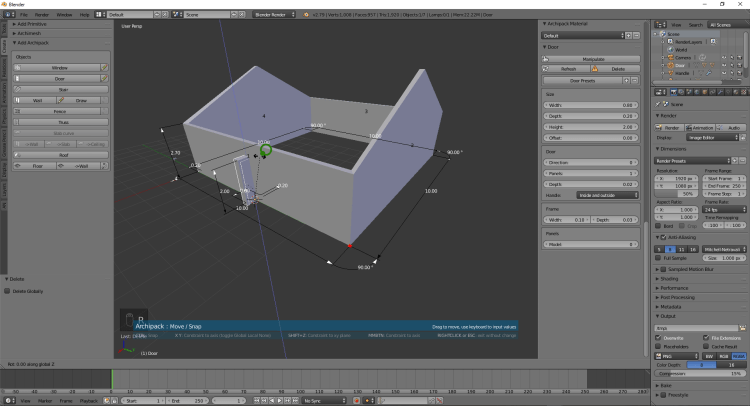
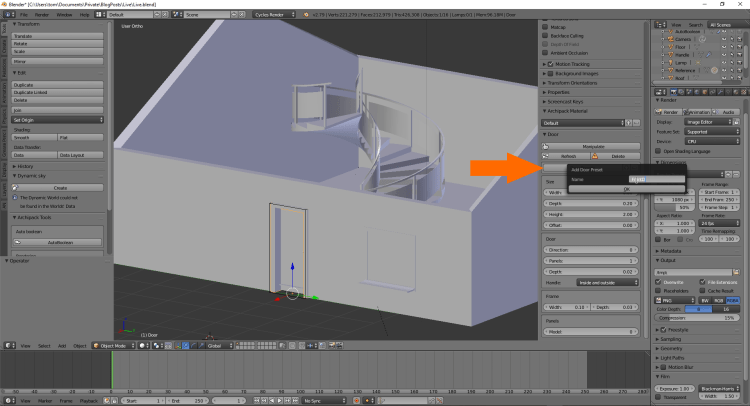
Adding a Door element from Archipack into Blender
From the Archipack tab you get a preview of different door types to choose from. These can include preset door types from your previous projects. In this example I add a 80 by 200. Just like walls, the properties become available on the properties shelf. Here you can adjust the size, the direction the door opens and closes, change the panel type and change the panel number. To rotate it you can just type R, then restrict it to the Z to restrict it, and in this case I entered 90 as the angle to rotate it by. (R, Z, 90 and enter)
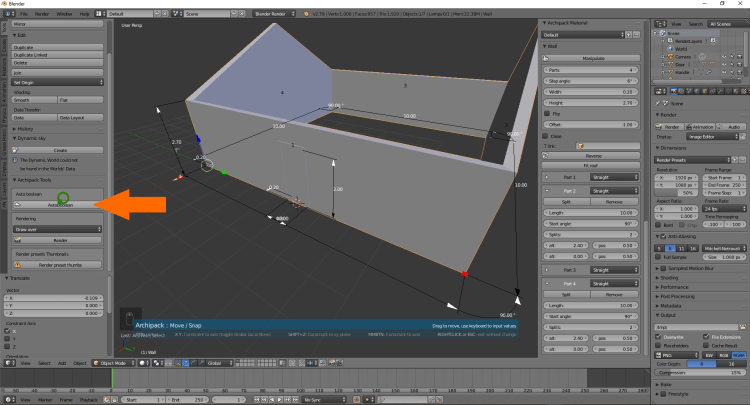
Subtracting with Archipack
To subtract the door from the wall and create an opening, go to the tool tab on the tool shelf, make sure the wall you want to add the boolean modifier to is selected. Click the “Auto boolean” button. If you make change to the door after this you must repeat the subtraction process again.
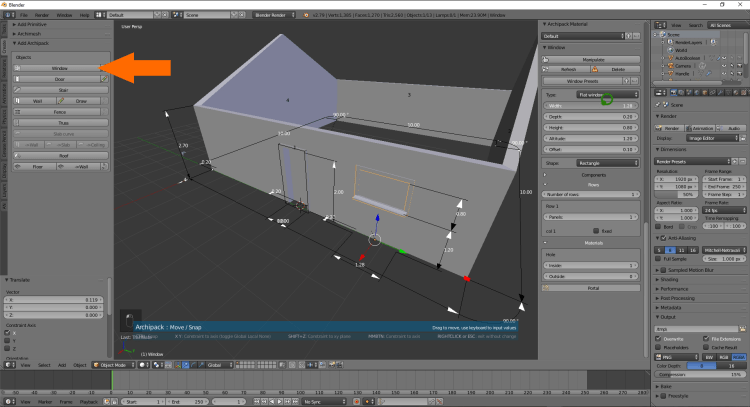
Adding a Window element from Archipack into Blender
Select what type of window you need and similar to the door properties you can control and adjust it to suit your scene. These include the width, depth, height or altitude. You can set the type of window to have a curved or straight top.
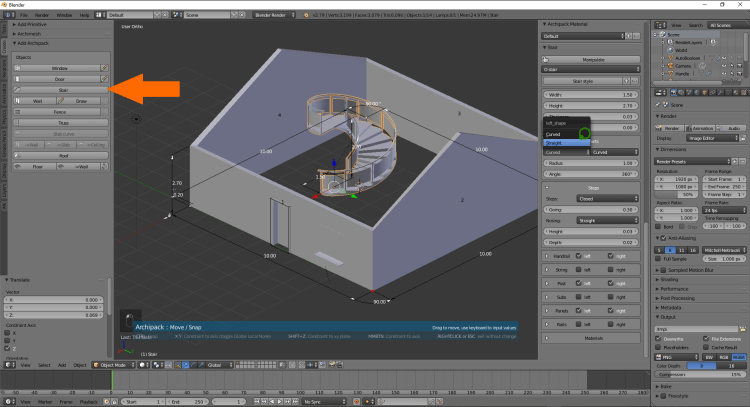
Adding a Stairs elements from Archipack into Blender
The stair is another great feature and packed with options that allow you create and customise to fit your scene. Save these properties for the next time and save time. There are many properties to help you create a custom stairs. These include the width, height, thickness the radius, whether you want straight sections curved sections or if the handrail should be left or right. More options include strings, posts, subs, panels and rails. Some very complex structures can be created with this great feature.
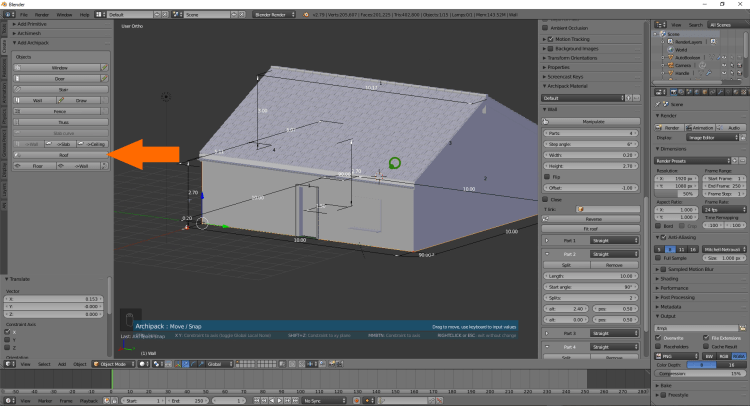
Adding a Roof Element
Using the dynamic dimensions of the roof you can quickly and quite easily position the roof onto your building.
Adding a Floor object from Archipack
There are a large selection of floor finishes to choose from in Archipack. The dynamic dimensions allow you to quickly adjust the length width or change the angle quite easily to fit any off square floor. With all these objects in Archipack using snap during transform really speeds up the workflow.
Saving Presets in Archipack
Saving preset properties for certain objects is a great way to build up a library of assets you can use time and time again. Once you have your changes made to a standard door for example, click the plus beside door presets, give your new custom door a name and next time you add a door the properties will be saved there. If you want a thumbnail image repeat the process of rendering again and your thumbnail image display will get updated with your custom door type.
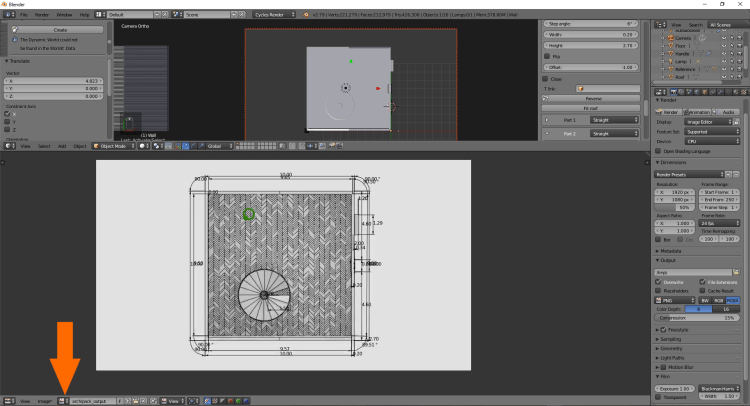
Rendering an image in Archipack
I normally change a few setting before I render my layout. For orthographic images I will change the default camera to orthographic in the camera settings. The next thing is set the render engine to cycles. In the world tab I’ll use nodes and just change the background colour to white. In the render settings I will normally enable freestyle. This renders a nice hard line around the edge of the objects. Make sure you have a material on them first, I use off white that way you get a better looking render result. From the tool tab on the tool shelf, click render. Give it a minute and you should get a notification on the header of the info editor. Change the timeline editor to a UV image editor and click in the drop down to find the Archipack render result. If you want to save the image, click the image tab next to the drop down and save image as.
Interested in 3D Design? Check out my New course available now at Udemy
