
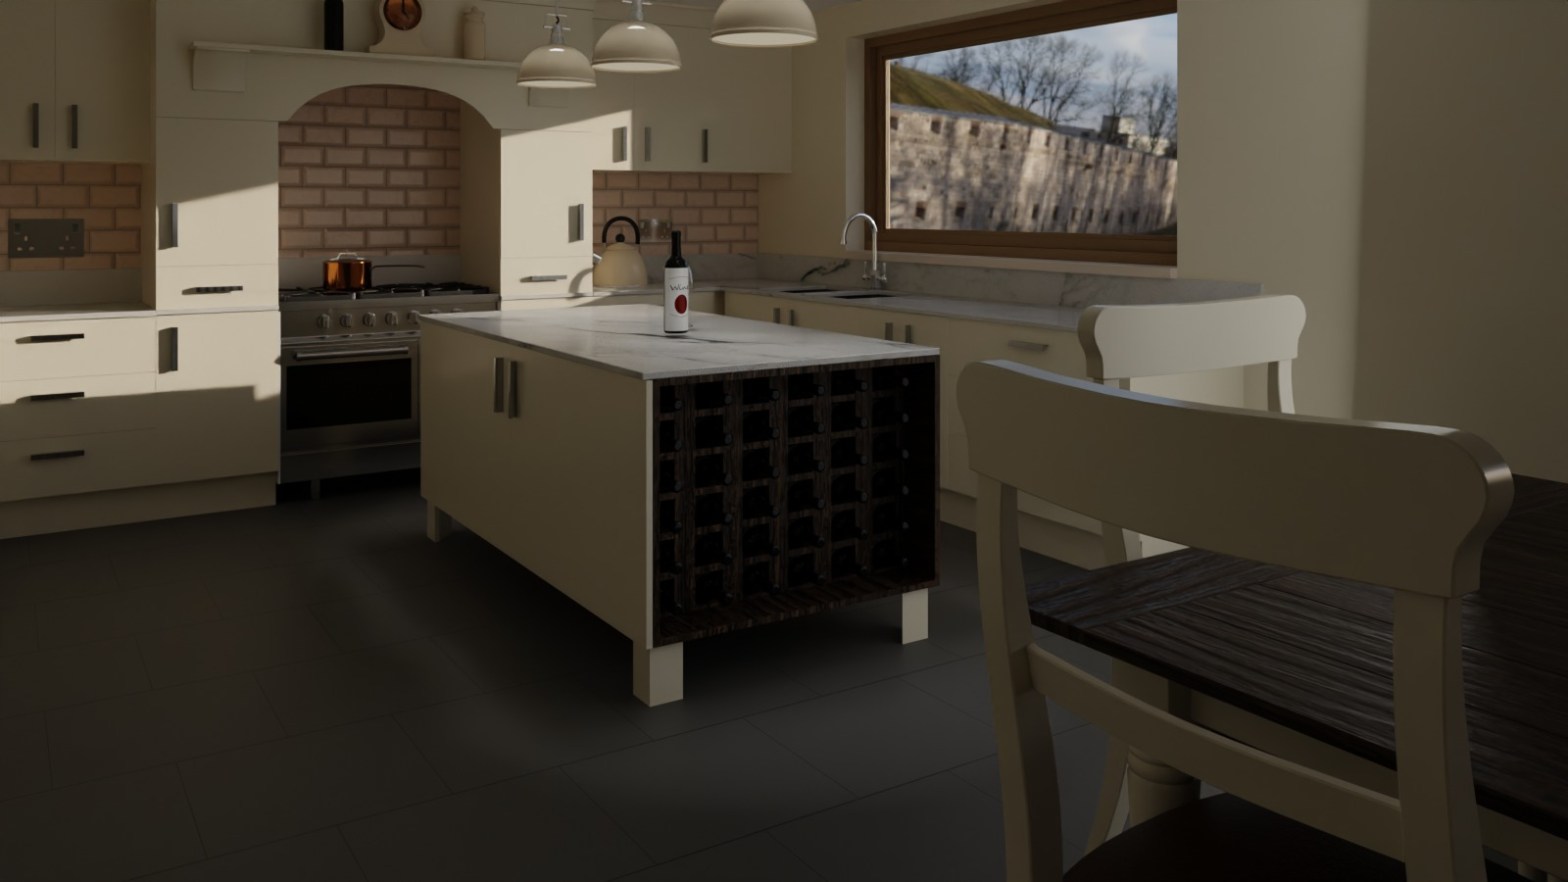
If the walls in your interior render lean inward or outward, the camera is tilted. Architectural photographers fix this with a shift lens, and Blender has the same tool built in. Keep the camera level, then slide the frame up or down with Lens Shift. Your verticals stay straight and you still choose what is in the shot.
Why do walls lean in Blender renders?
When the camera points down at a kitchen island, every vertical line (wall corners, cabinet sides, window frames) converges toward the floor. That is three-point perspective, and it looks like a phone snapshot rather than an architectural image. Two-point perspective keeps all verticals parallel to the frame edges. The only rule is that the camera must not tilt up or down.
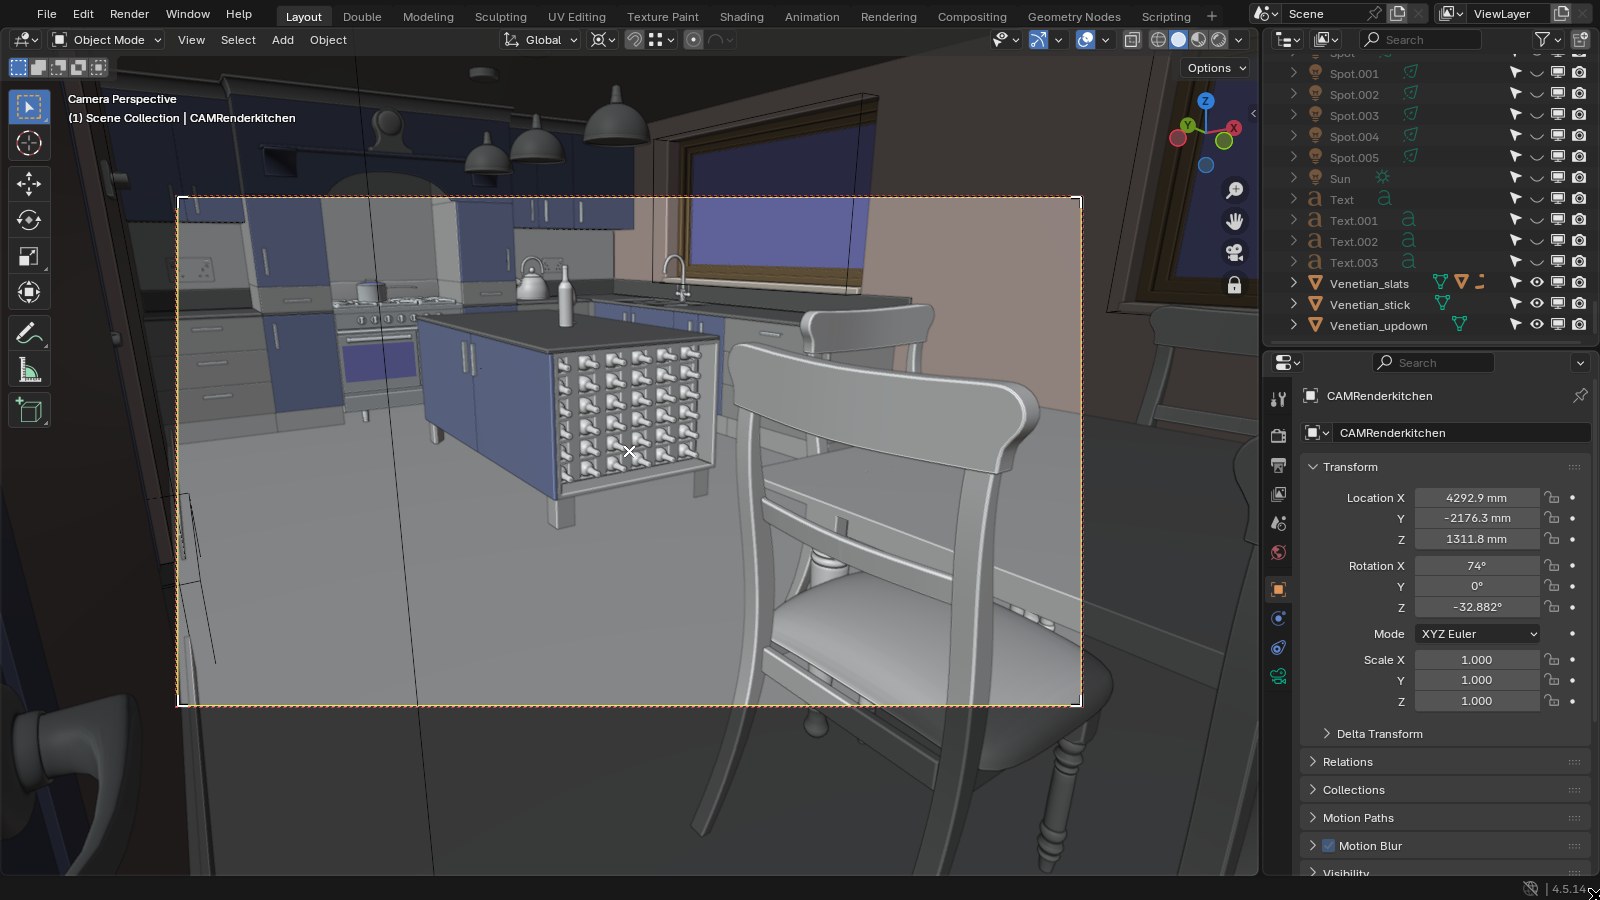
Step 1: Level the camera
Select the camera, open Object Properties and set Transform, Rotation X to 90 degrees and Rotation Y to 0. Leave Rotation Z alone, as that is your viewing direction. Press Numpad 0 to look through the camera.
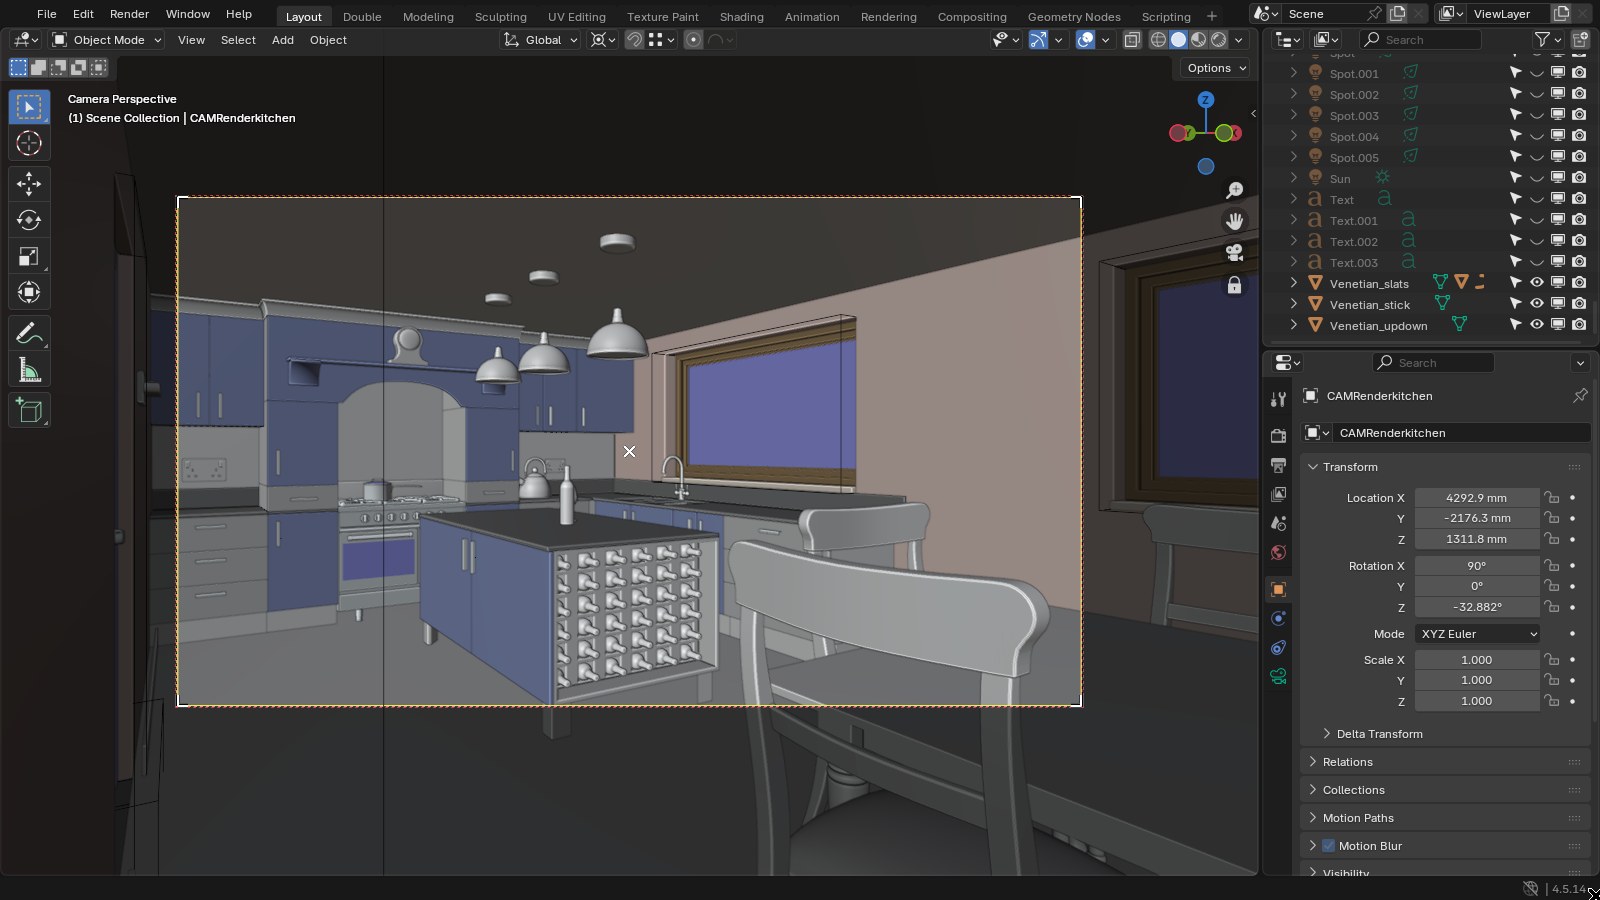
Step 2: Reframe with Lens Shift, not rotation
Open Camera Properties (the green camera icon) and expand Lens. Set Focal Length to around 28 mm for a room, then drag Shift Y down (here -0.15) until the floor and island sit in frame. Shift moves the frame without tilting the camera, so verticals stay straight. Shift X does the same sideways.
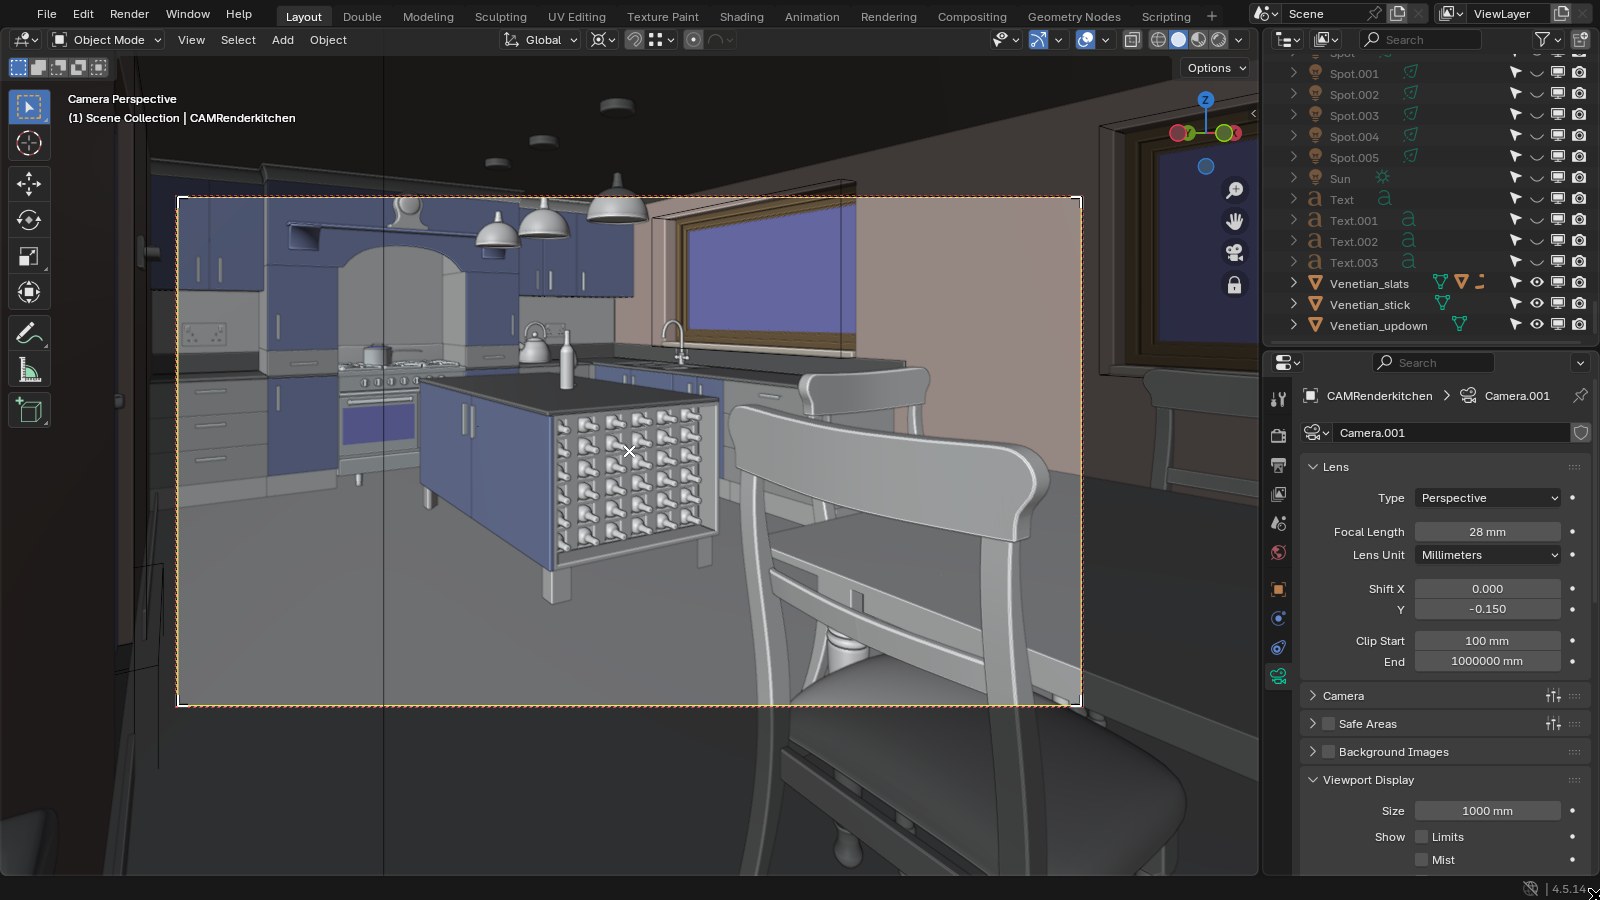
Step 3: Check the composition
In Camera Properties, Viewport Display, tick Passepartout to darken everything outside the frame, and under Composition Guides tick Thirds. Line up a strong vertical, like the island edge or a wall corner, with a third line and check it runs parallel to the guides.
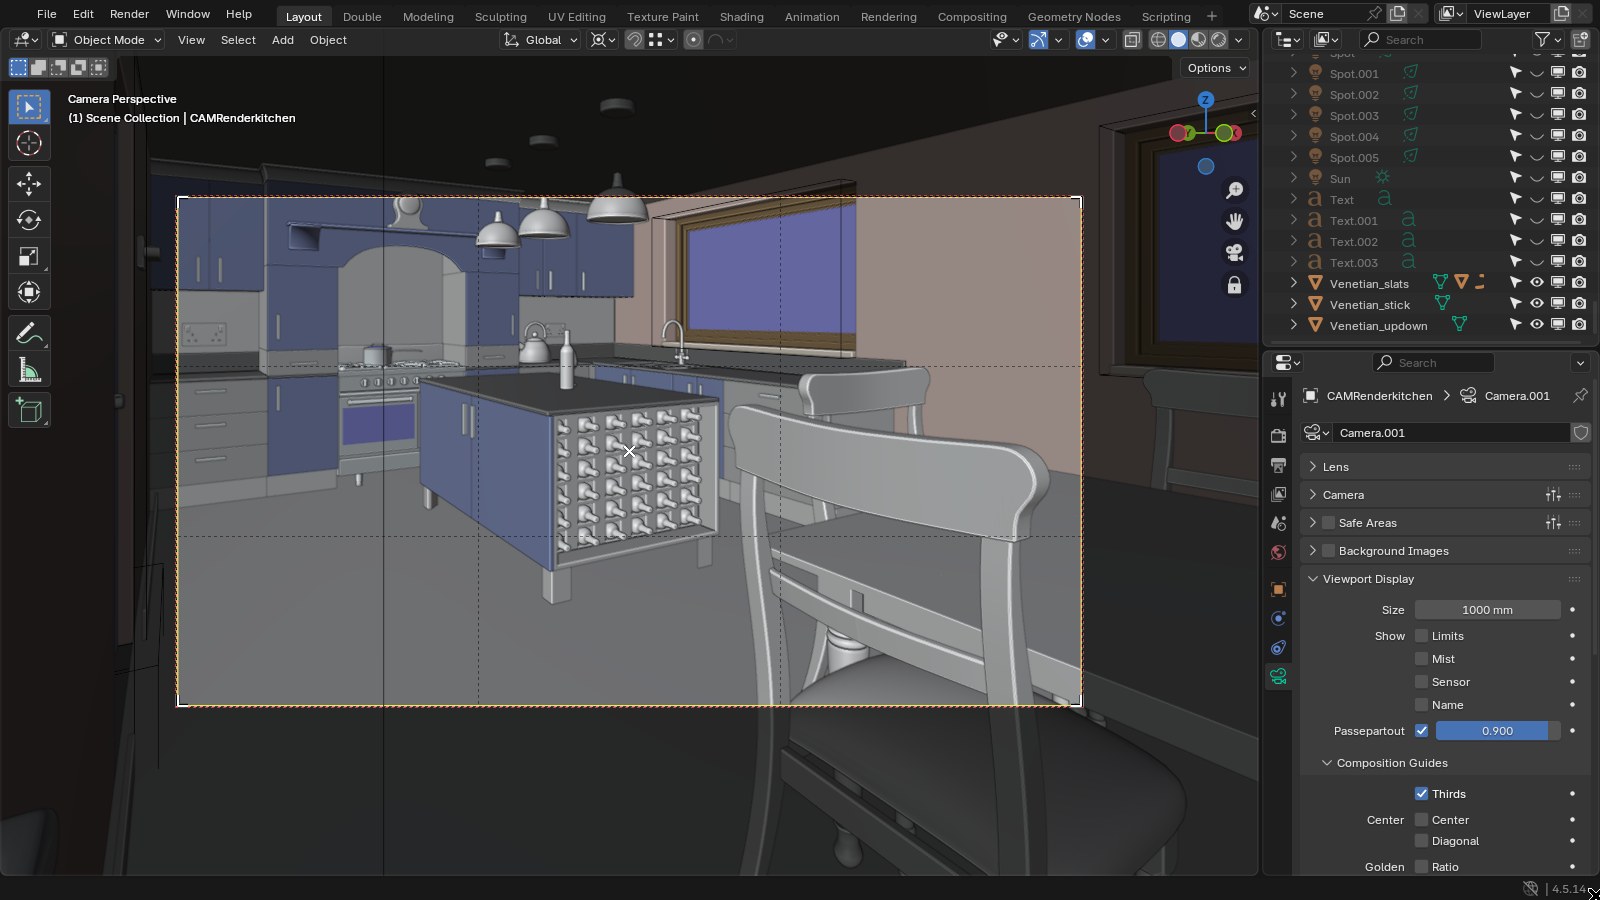
Step 4: Render
Press F12. Wall corners, cabinet edges and the window frame now stand straight.
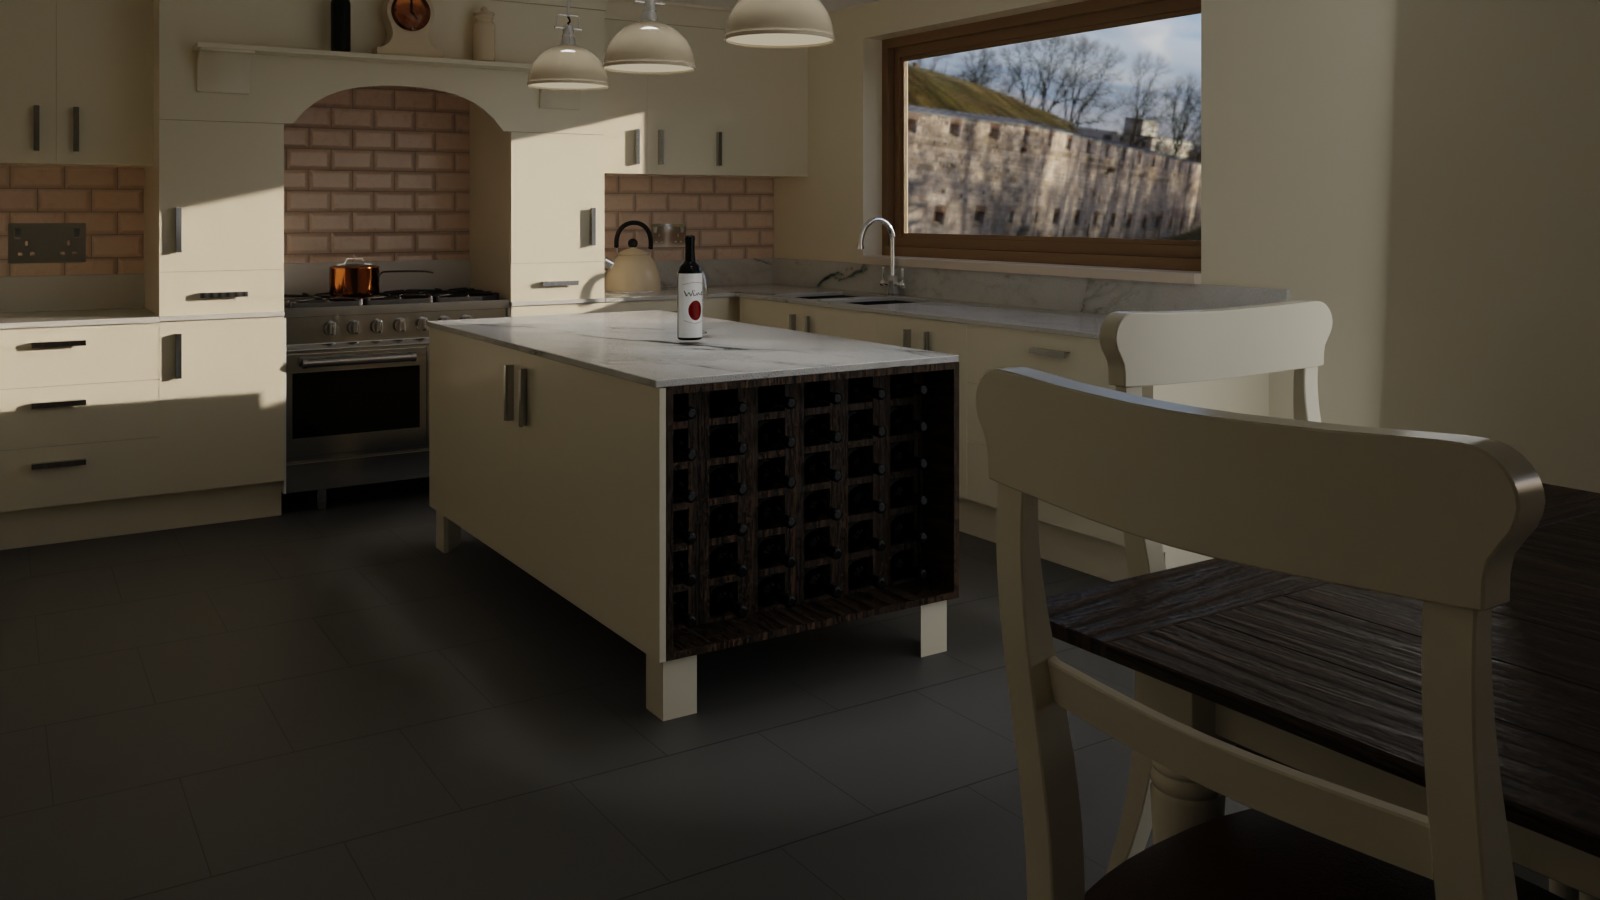
Common problems
- Walls still lean slightly: check Rotation Y is exactly 0 and that no parent or constraint adds tilt to the camera.
- Lots of empty floor or ceiling: that is what Shift Y is for. Very large shift values can look stretched at the edges, so step back or widen the lens instead.
- Very wide lenses (below about 20 mm) stretch furniture near the frame edge. Keep the main furniture away from the corners.
- Animating a walkthrough: keyframe Shift Y along with the camera so the framing stays consistent.
If you want to go from a level camera to full interior and exterior architectural scenes, my Udemy course walks through modelling, lighting, cameras and animation for architecture in Blender.
